Inside a job — the item detail
Lite+Click a job’s number on the Job Manager to open its item detail — every item in the job, with a task grid running across the top. Each task cell shows progress (green = done, grey = not applicable) and a play marker on the tasks still open to claim. Part-Level Tasks (like Admin or Invoicing) sit above the grid with their own Start buttons.
The item right-click menu
Right-click any item row for its menu. Each action opens its own dialog; where a full how-to exists it’s linked.
- View Item Paperwork — open the item’s worksheet to view and mark it up. See View & mark up item paperwork.
- Hold Item — pause a single item without holding the whole job.
- Item Properties — edit the item’s details.
- View Order Information — see what’s been ordered for the item. See Goods to order.
- View Note — read the note held against the item.
- View Incomplete Task — jump to the item’s next unfinished task.
- Raise NCP… / View NCP… — log or review a non-conforming product for the item. See Raise an NCP.
- Change Item Quantity — adjust how many of the item the job needs.
- Add New Item — add an item straight into the part, seeding the tasks it needs. See Adding a new item below.
- Remove Item — take an item off the job. See Part items.
- Admin: Claim All Tasks Complete / Claim All Time-Based Tasks Complete — supervisor shortcuts to mark an item’s tasks finished.
The item actions in detail
Hold Item
- Right-click the item and choose Hold Item.
- Enter a reason for the hold.
- Confirm Hold — just that item pauses (the whole job keeps moving); release it the same way.
Item Properties
- Right-click the item and choose Item Properties.
- Edit the item’s details — dimensions, name, item note — and use the Tasks and Documents tabs for its task list and files.
- Save (or Save and New to add another).
Change Item Quantity
- Right-click the item and choose Change Item Quantity.
- Enter the new quantity. Task minutes are scaled proportionally to match.
- Apply.
Adding a new item
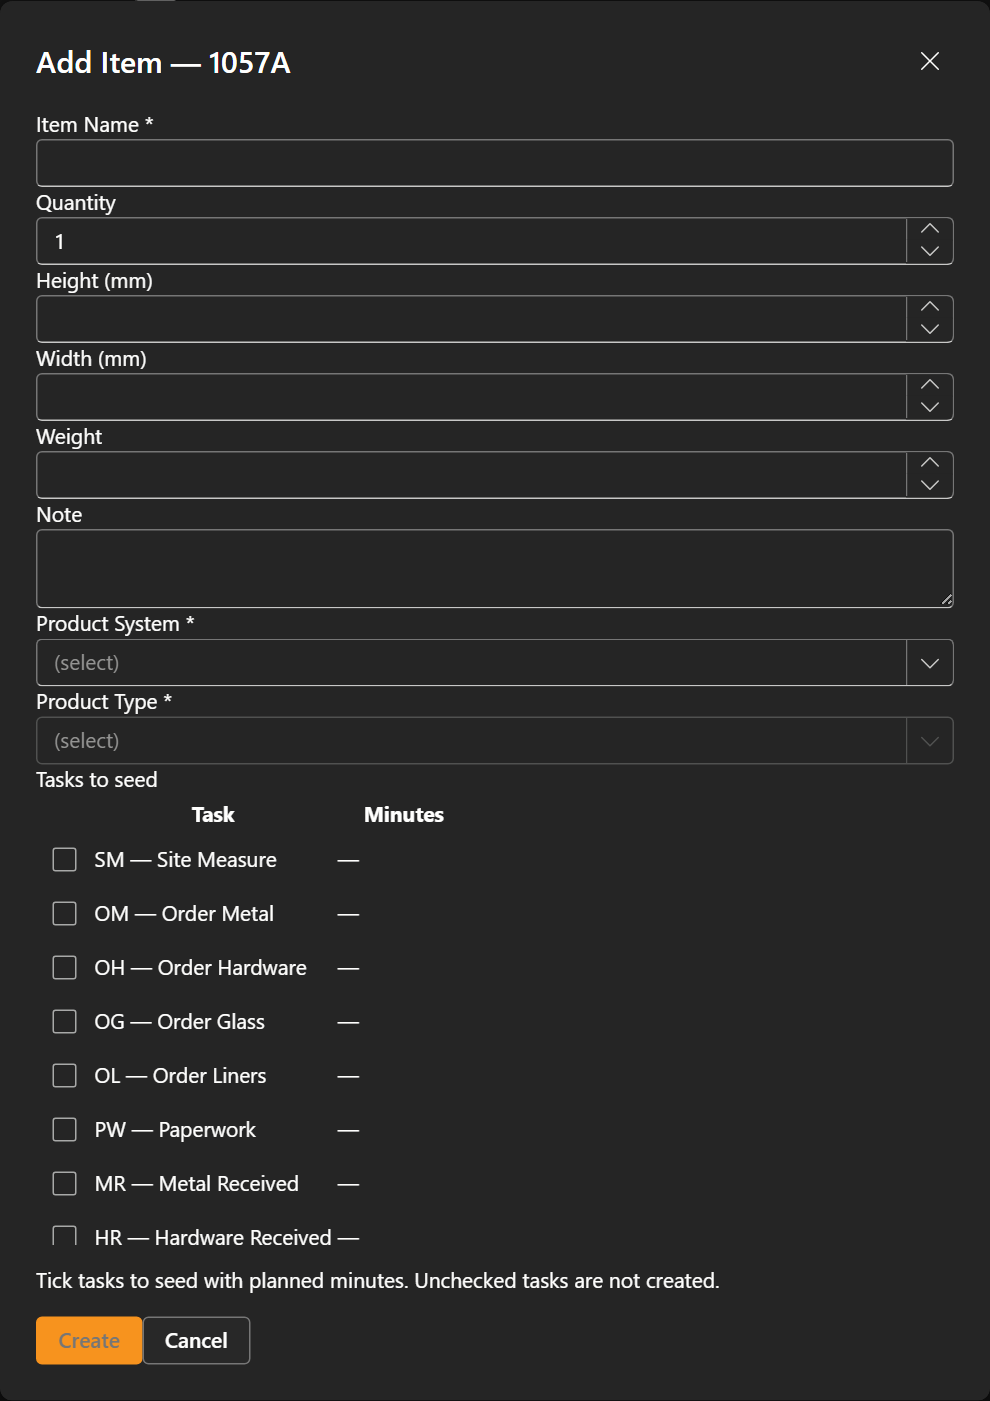
Add New Item opens one dialog that grows as you fill it in — you enter the item’s details, then pick its product and choose which tasks to seed.
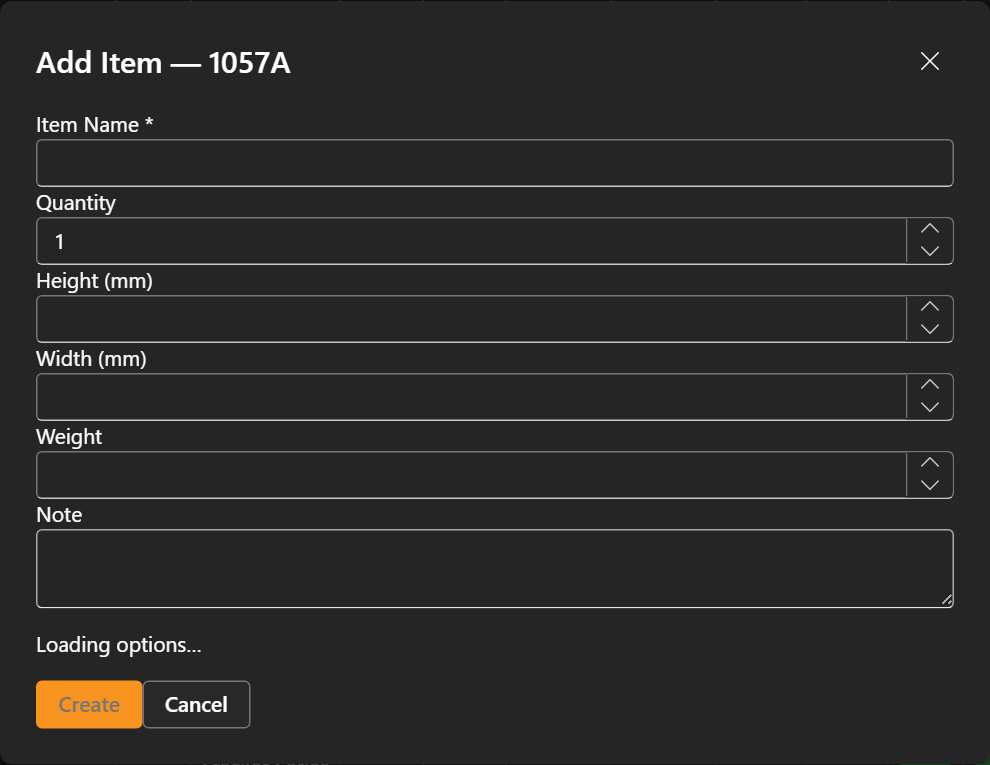
- Right-click the item row (or use the item toolbar) and choose Add New Item.
- Fill in the Item Name (required), Quantity, and the Height / Width / Weight and Note if you need them.
- Once the options load, pick the Product System and Product Type (both required) — these define the item and drive its default tasks.
- Under Tasks to seed, tick the tasks this item needs (SM — Site Measure, OM — Order Metal, OH — Order Hardware, OG — Order Glass, OL — Order Liners, PW — Paperwork, MR — Metal Received, HR — Hardware Received, and so on) and set their planned minutes. Unchecked tasks are not created, so only seed the work that applies.
- Create — the item is added to the part with just those tasks on its grid.
You need to Select Worker (sign in to the kiosk) before you can start tasks or open item paperwork. Right-clicking a job on the main board opens a different menu — see The job right-click menu.