CRM
Lite+Track customers, contacts, and the opportunities you’re chasing — from first phone call through to won (or lost) deals.
When to use
Use the CRM module to:
- Keep a single source of truth for who your customers are and who to contact at each one.
- Capture inbound enquiries as opportunities — even before you know which customer they’ll belong to.
- See every conversation, quote, and follow-up for an opportunity in one place.
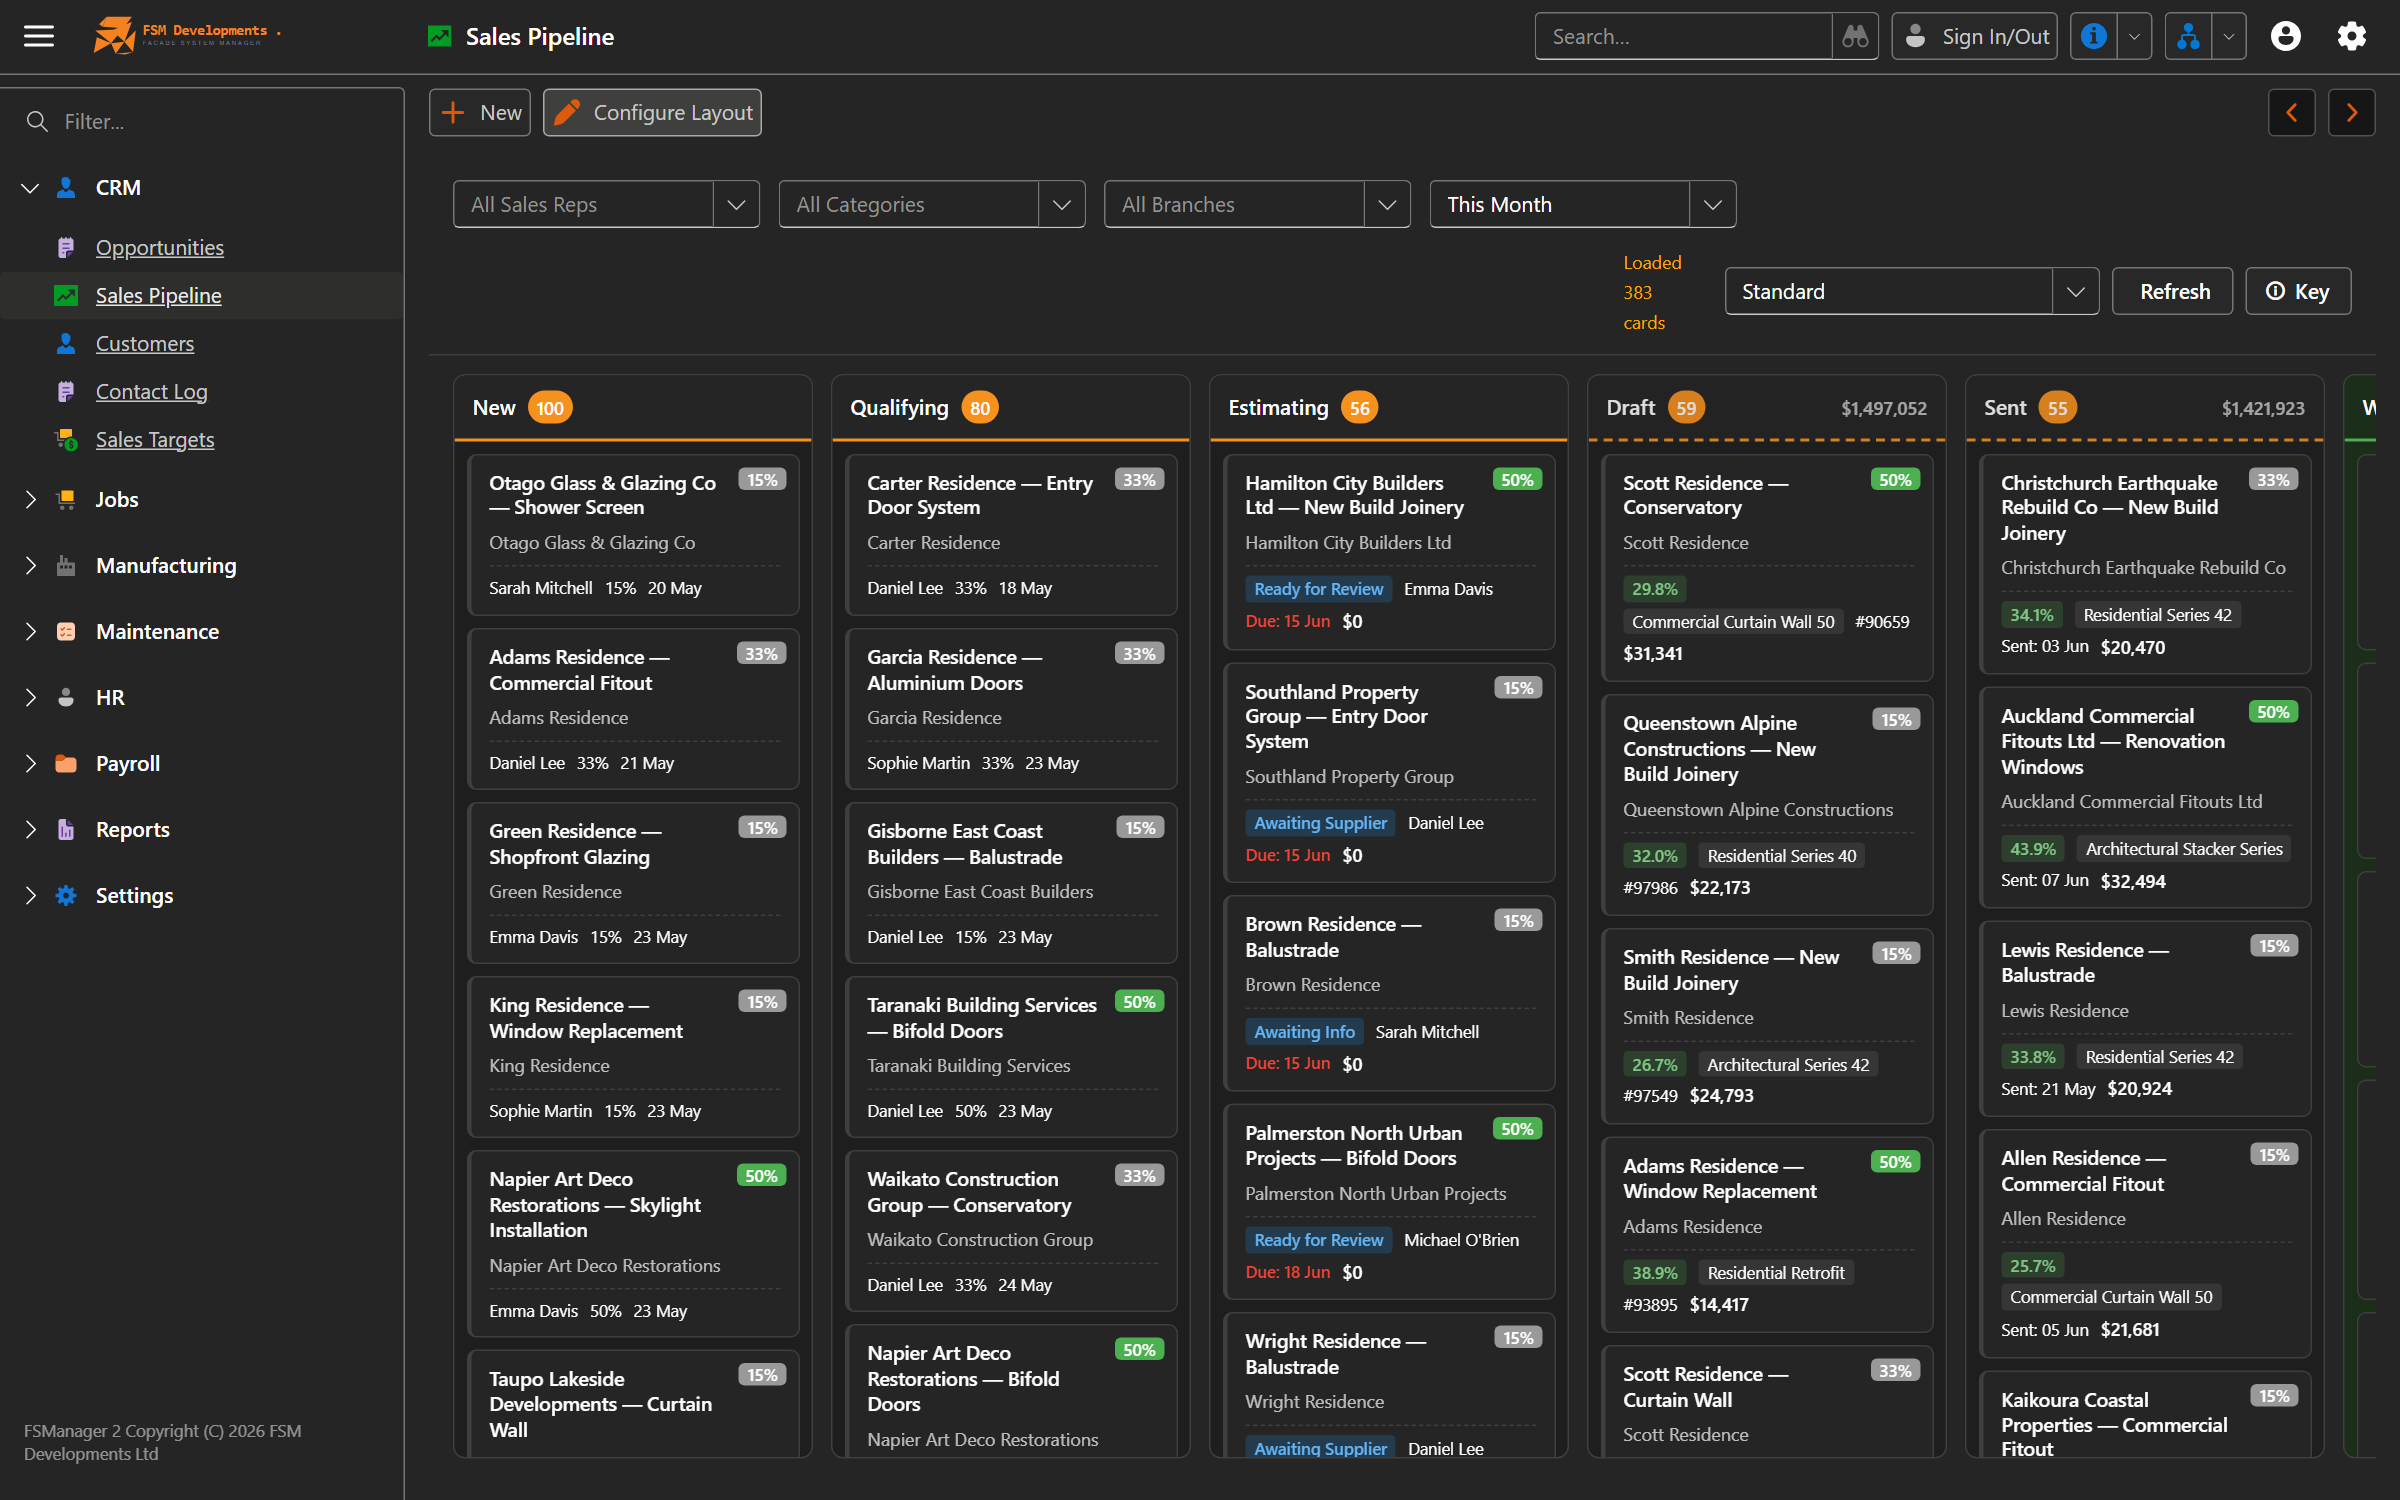
- Run the sales pipeline — what’s open, what’s overdue, what’s likely to close this month.
If you’re only quoting one-off jobs and don’t need to track follow-ups, you can skip straight to the Quoting & Sales module. The CRM sits behind quoting — every quote belongs to an opportunity, which belongs to a customer.
Overview
The CRM is built around three records:
- Customers — the businesses (or individuals) you sell to.
- Contacts — the people at each customer. Every customer must have at least one contact, with one marked as the default.
- Opportunities — a specific potential deal. An opportunity starts as a prospect enquiry and ends as Won (a job) or Lost.
Quotes hang off opportunities. A single opportunity can have multiple quotes (e.g. “Option A — Aluminium”, “Option B — uPVC”), with one designated as the primary quote that drives reporting.

Key features
Customer records
Each customer captures:
- Name (required and unique across your business) and an optional Display Name for trading-as.
- Postal address, phone, email, notes.
- Sales Rep — the person at your business who owns the relationship.
- Customer Class (e.g. Gold / Silver / Bronze) — a pricing tier that drives standard markup.
- Account Type — the default payment schedule (e.g. deposit required) that flows onto new quotes.
- Lead-time override — if a specific customer has a custom build lead time, set it here instead of using the global default.
- Site address auto-fill — for customers whose deliveries always go to the same warehouse, tick “Use address for site address” and new opportunities will pre-populate.
Contacts
Multiple contacts per customer, with roles like Builder, Site Manager, Project Manager, Quantity Surveyor, Director, Account Manager. Exactly one contact must be marked as the default — that’s who gets used when you don’t explicitly pick someone (e.g. on a new opportunity).
Contacts require first name, last name, email and phone. If you don’t have an email yet, enter a placeholder you can update — the system will block save without one.
Opportunities
The heart of the sales pipeline. An opportunity tracks:
- Title — what the customer is asking for, in your words.
- Customer — optional at creation. You can log an enquiry with just a prospect name, email and phone, and link the customer later when you know who they’re working for.
- Primary Contact — filtered to the linked customer’s contacts.
- Category — your job category (required for sales target reporting).
- Source — where the lead came from (required, drives marketing reports).
- Probability — how likely you think it is to close. Used to compute weighted pipeline value.
- Sales Date — dual-purpose:
- While open: the expected close / next follow-up date. Used for pipeline month bucketing and the Overdue flag.
- Once Won or Lost: the date the outcome was recorded.
- Tender Date — only shown for categories that involve tenders.
Opportunity lifecycle
Opportunities move through a small set of statuses:
| Status | Meaning |
|---|---|
| New | Just captured, no estimation started |
| Qualifying | Rep evaluating whether to pursue |
| Quoting | One or more quotes under development — the underlying quote revision drives the sub-stage (Estimating / Draft / Sent) |
| Won | Deal closed — record is locked |
| Lost | Deal lost — Lost Reason required; record is locked |
The display stage breaks Quoting into Estimating / Draft / Sent based on the active quote revision, so the pipeline at a glance shows you what’s where.
Contact logs (follow-ups)
Every customer interaction can be logged against the opportunity: phone call, email, in-person meeting, letter. Logs can be flagged as requires action with a due date, which surfaces them in the follow-up queue until marked complete.
All logs live on the opportunity, regardless of whether they relate to a specific quote — so the full communication history is always in one place.
Customer pricing classes
Customer Class (e.g. Gold / Silver / Bronze) is a lookup you maintain under Settings. Each class carries a default markup percentage. Assigning a class to a customer means new quotes start with the right markup.
How to: add a new customer
- From the main menu, open Customers → New.
- Enter the customer Name (must be unique) and any trading name in Display Name.
- Fill in address, phone, email, and notes.
- Assign the Sales Rep who owns the relationship.
- (Optional) Pick a Customer Class for pricing tier and a Default Branch for multi-branch businesses.
- Save. You’ll be prompted to add at least one Contact — the first contact is automatically marked as default.
How to: log a new enquiry as an opportunity
When a phone call comes in and you don’t yet know which customer the caller will become:
- Opportunities → New.
- Enter a clear Title describing what they’re asking for.
- Leave Customer blank and fill the Prospect Name / Email / Phone fields instead.
- Pick a Category (e.g. Residential — New Build) and a Source (e.g. Referral, Website).
- Probability auto-fills from your CRM defaults — adjust if needed.
- Set a Sales Date for when you expect to next action this.
- Save.
When you create the first quote, FSManager will automatically convert the prospect details into a Customer record and link them. You can also link to an existing customer at any time before then.
Once a Customer is linked, the prospect fields lock — the customer record becomes the source of truth.
How to: progress an opportunity through the pipeline
From the opportunity detail view, the toolbar exposes the actions you’ll use most:
- Add Estimation — creates a new quote (or re-estimates an existing one) under this opportunity.
- Qualify — moves an opportunity from New to Qualifying.
- Follow Up — logs a contact log with a due date for follow-through.
- View Budget — opens the cost budget on the active quote revision.
- Add Markup — applies a markup or margin percentage to the active quote.
- Win Quote — marks the opportunity as Won.
- Lost Opportunity — marks the opportunity as Lost; you’ll be prompted for a Lost Reason.
- Clone Opportunity — copies the opportunity (title only — no quotes), handy for a repeat customer asking for “the same again”.
How to: merge duplicate customers
If you’ve ended up with two customer records for the same business (common after CSV imports):
- Open the Customers list view.
- Select the duplicate customers (multi-select).
- Use the Merge Customers admin action and pick the record to keep.
- All opportunities, quotes, jobs and contacts are re-parented to the kept record; duplicates are soft-deleted.
Merge is admin-only and the source records are deleted (soft). Double-check the kept record is the right one before confirming.
Tips & gotchas
- Every customer needs a default contact. Save will block until exactly one contact is marked
Is Default. If you delete the default, mark another before saving. - Don’t leave Probability at zero unless you mean it. It feeds the weighted pipeline value — a “100% probability” opportunity at $0 is a saved-but-unbudgeted slot in the pipeline.
- Sales Date is your follow-up calendar. Every time you action an opportunity, push the Sales Date forward to the next planned action. Anything with a Sales Date today-or-earlier shows up as Overdue.
- Multi-customer projects: if you’re quoting the head contractor but the work goes to a sub, set
Customeron the Quote to the head contractor — it overrides the opportunity’s customer for that one quote. - Lost opportunities need a reason. Don’t leave it as “Other” by default — set up Lost Reasons under Settings that match the actual reasons you lose (price, lead time, spec, etc.) so your reports tell you something useful.
- Tender Date only appears for categories where it makes sense. If you don’t see the field, check the Category’s Tender Date Can Be Set flag under Settings → Job Categories.
Related
- Quoting & Sales — building quotes against an opportunity
- Job Management — what happens when a quote is won
- Reporting & Analytics — sales pipeline, sales targets, and the Sales Predictor
- Administration → Settings — configuring categories, lead sources, lost reasons, customer classes