Setup Wizard
The Setup Wizard walks the first administrator of a new tenant through 12 steps of initial configuration. It runs once on first login; afterwards you’ll do everything else from the Settings area.
When you see it
The wizard appears automatically when the first administrator logs in to a brand-new tenant. Regular users never see it. Once it’s completed (or skipped to the end), it doesn’t run again — but every step is editable later from Settings, and the Setup Check page surfaces anything still incomplete.
If you need to revisit the wizard partway through (interrupted, browser refreshed) just log in again — it picks up where you left off. Each step also has a ← Back to step N link if you need to change an earlier answer.
Plan around an hour for the full wizard. Step 4 (Dieholders) does the most under the hood — it cascades a whole catalogue of products, colours, glass, and hardware into your tenant. It can take a minute or two to run.
The 12 steps
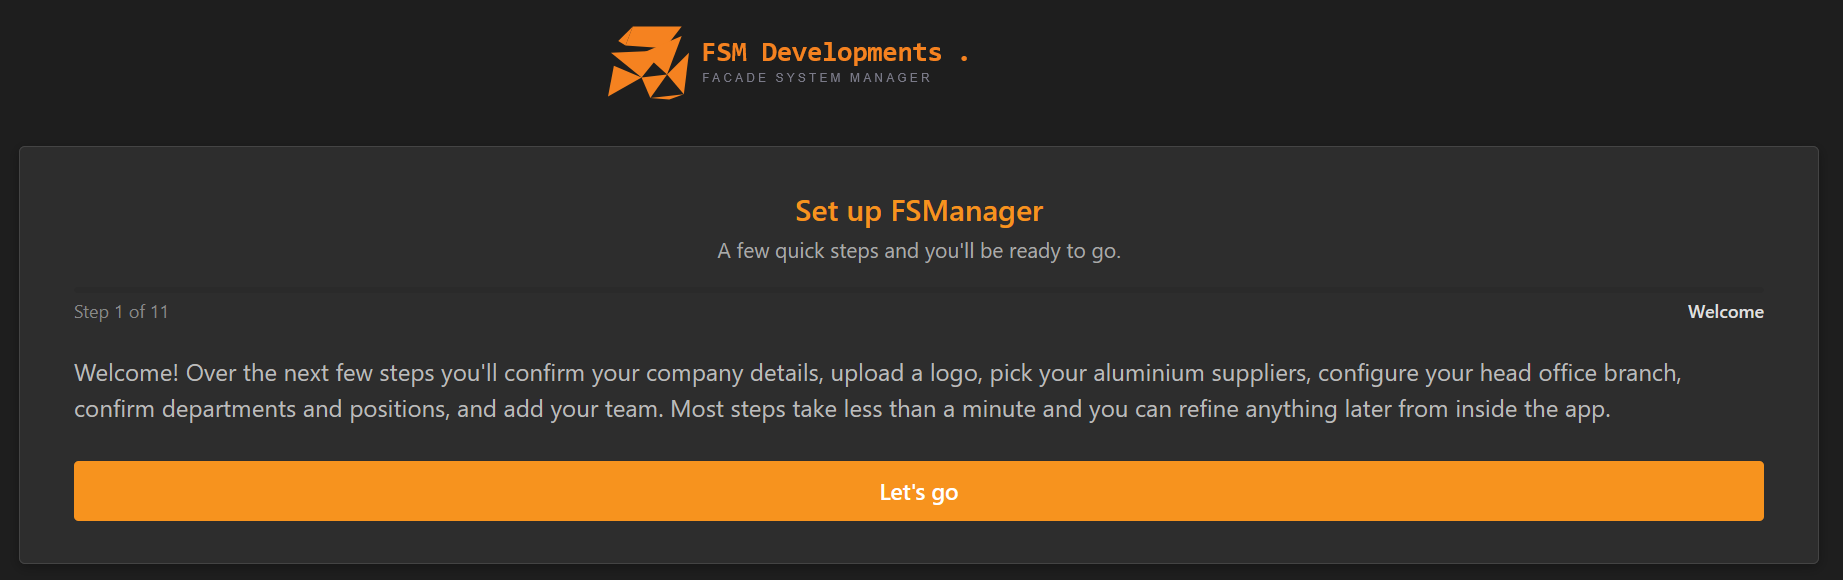
Step 1: Welcome
A short overview: “Over the next few steps you’ll confirm your company details, upload a logo, pick your aluminium suppliers, configure your head office branch, confirm departments and positions, and add your team. Most steps take less than a minute and you can refine anything later from inside the app.” Click Let’s go.
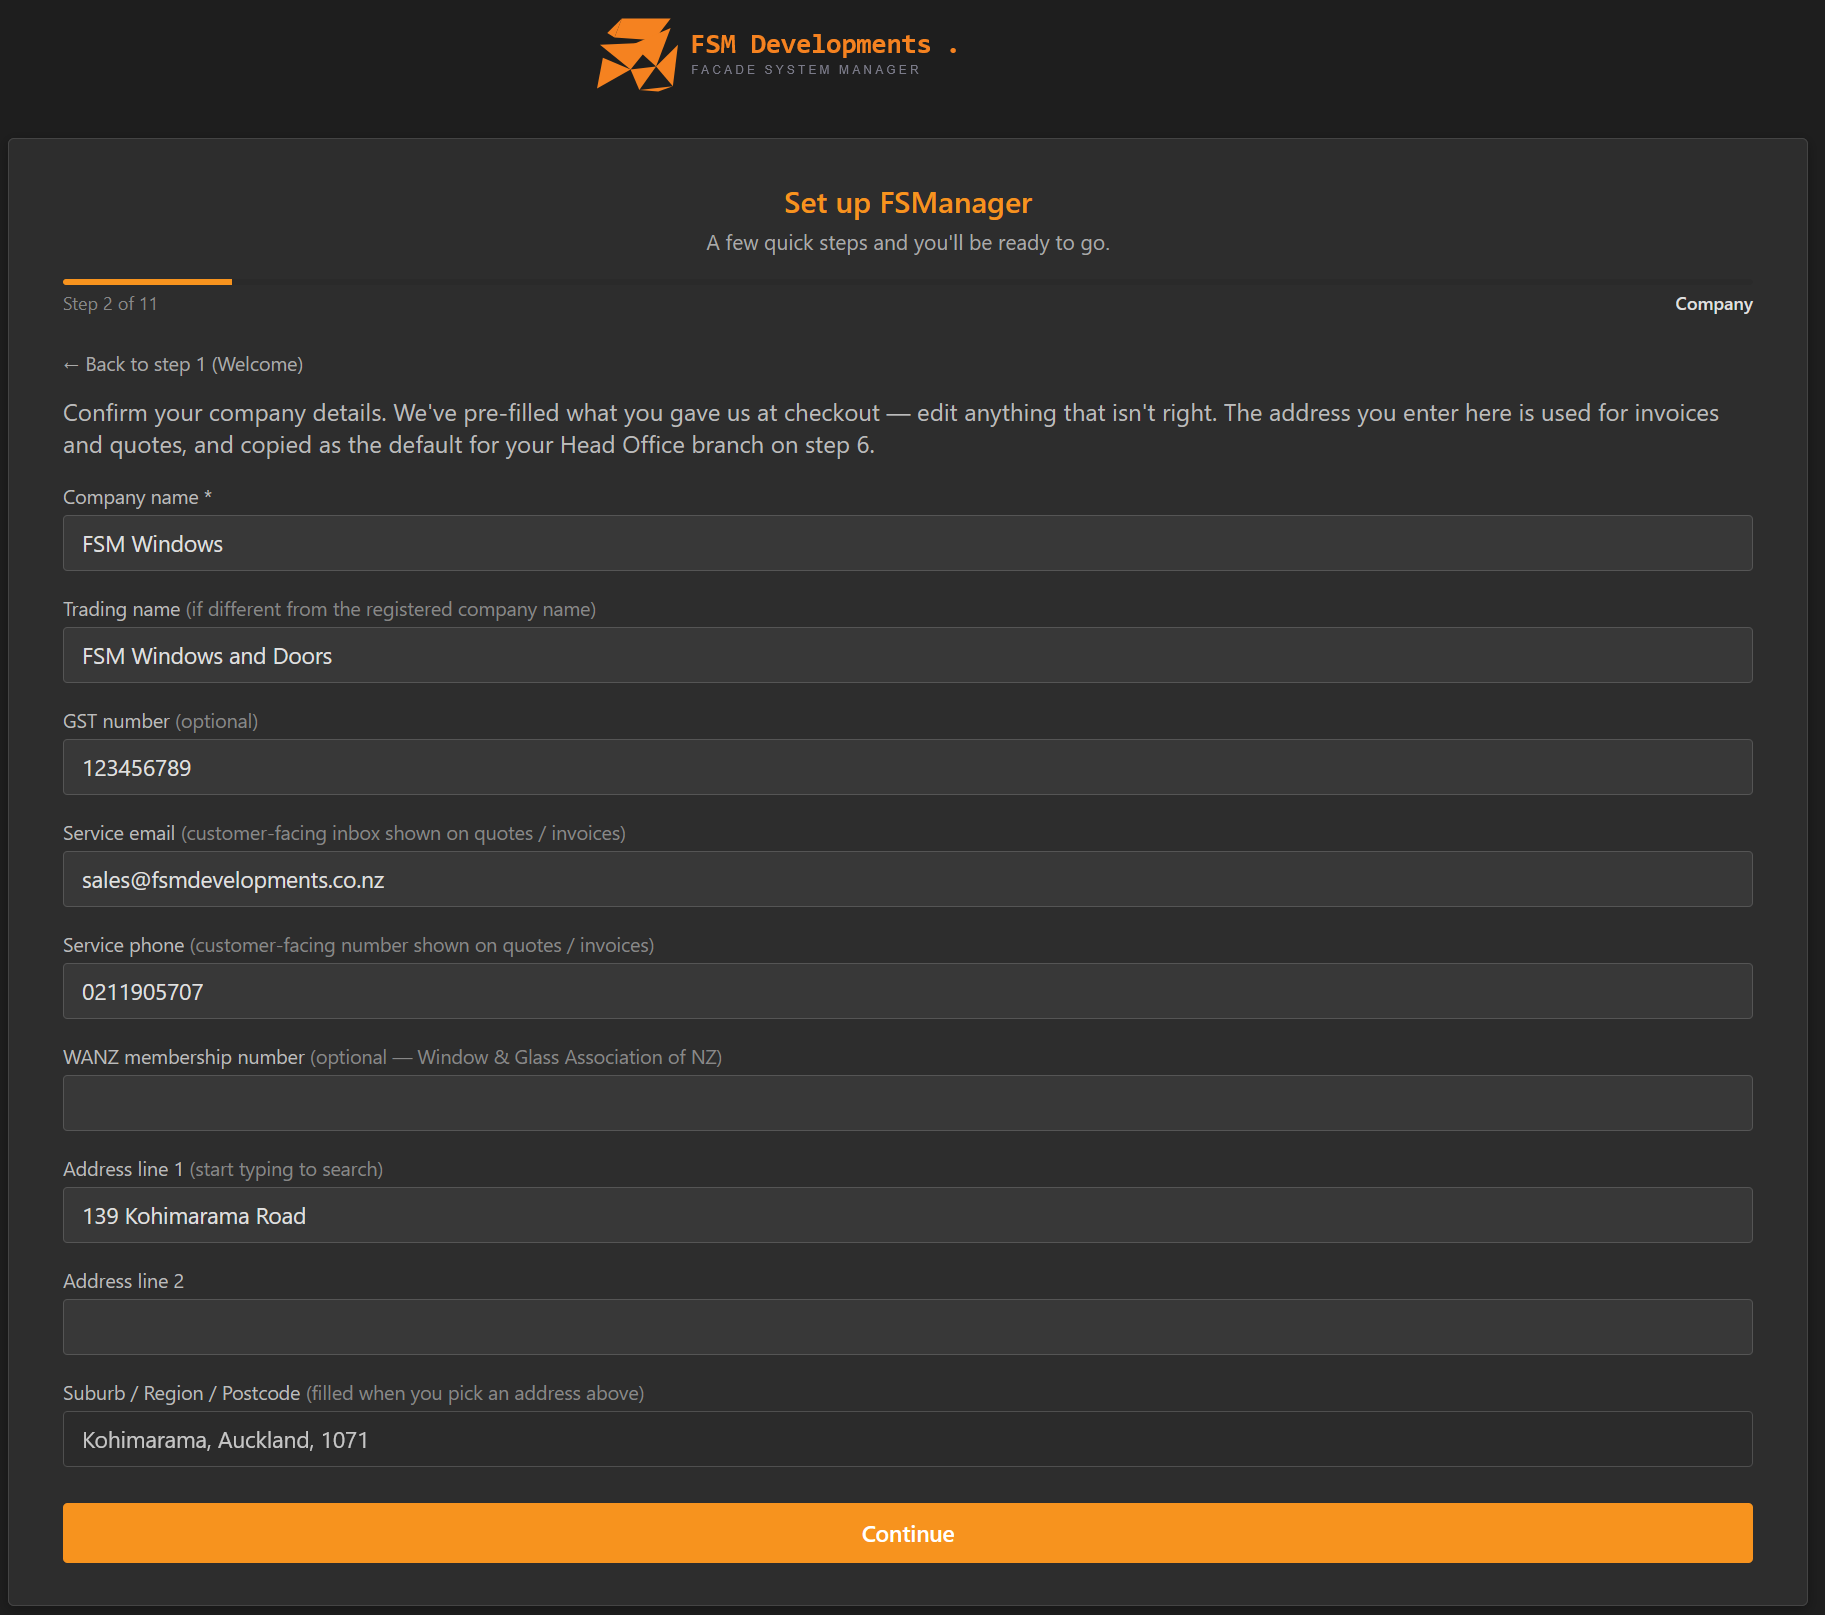
Step 2: Company
Your business identity, pre-filled with what you gave at checkout — edit anything that isn’t right. The address you enter here is used on invoices and quotes, and is copied as the default for your Head Office branch (step 7).
- Company name (required) — your registered legal entity name.
- Trading name — the name customers know you by, if different from the registered name.
- GST number (optional) — your tax registration number.
- Service email — the customer-facing inbox shown on quotes and invoices.
- Service phone — the customer-facing number shown on quotes and invoices.
- WANZ membership number (optional) — your Window & Glass Association of NZ member ID (used on certification documents).
- Address — start typing in Address line 1 to search (Google Places); Suburb / Region / Postcode fills in automatically once you pick a match.
Step 3: Logo
Upload your company logo (PNG / JPG / SVG). It appears on generated quotes, invoices, and the dashboard. The selected logo saves when you press Continue.
Optional — you can add or change it later from Settings → Tenant.
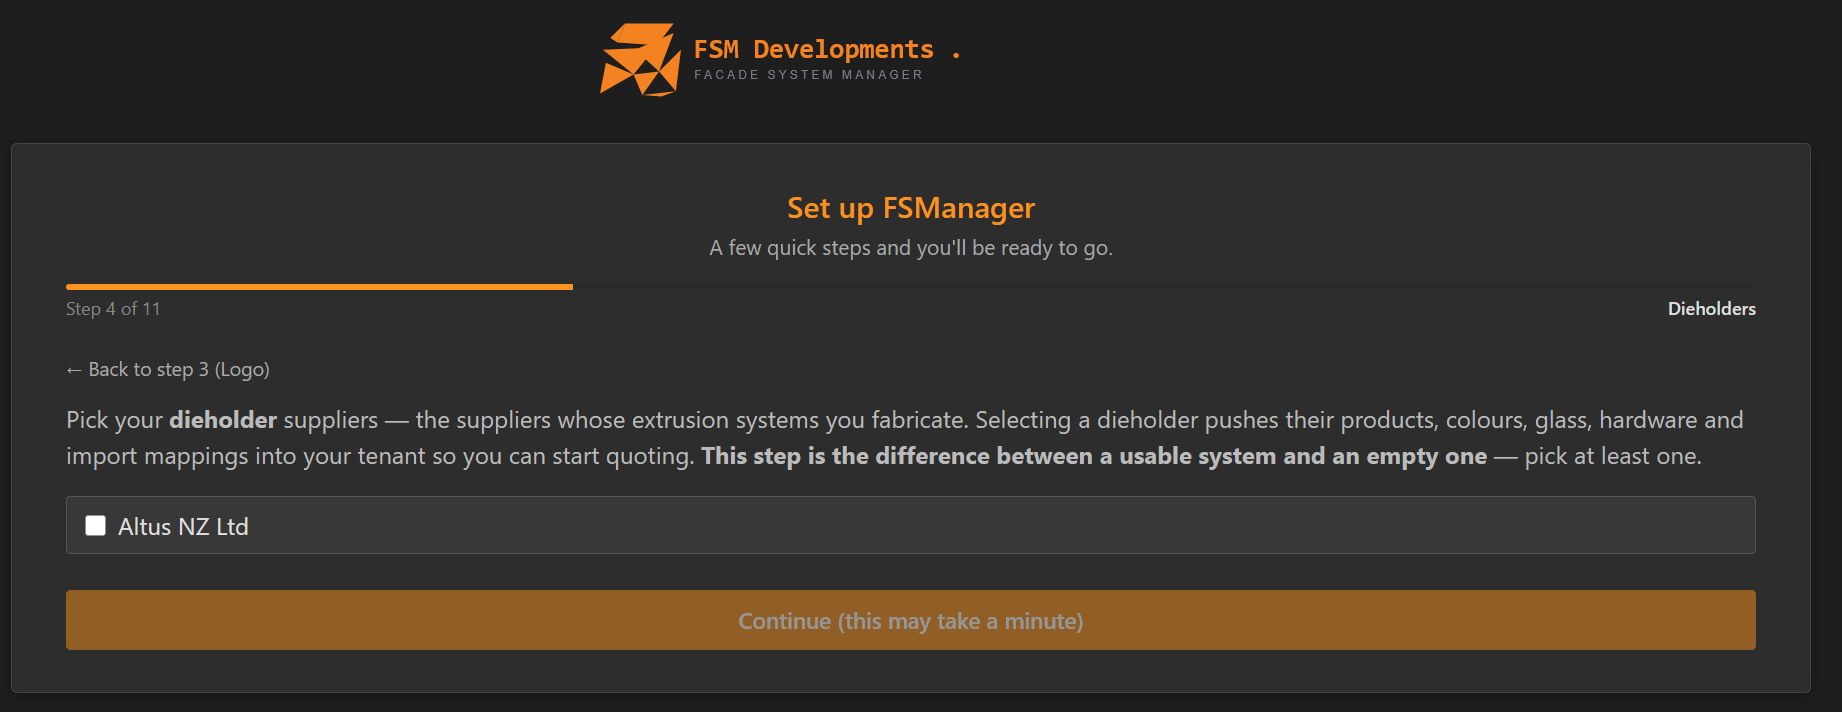
Step 4: Dieholders
The most important step in the wizard. Pick the dieholder suppliers — the suppliers whose extrusion systems you fabricate. Selecting a dieholder pushes their products, colours, glass, hardware and import mappings into your tenant so you can start quoting.
This step is the difference between a usable system and an empty one — pick at least one.
The cascade can take a minute — the button reads Continue (this may take a minute). Let it finish. Pick all the systems you actually work with in one pass; it’s faster run once for everything than retrofitted later.
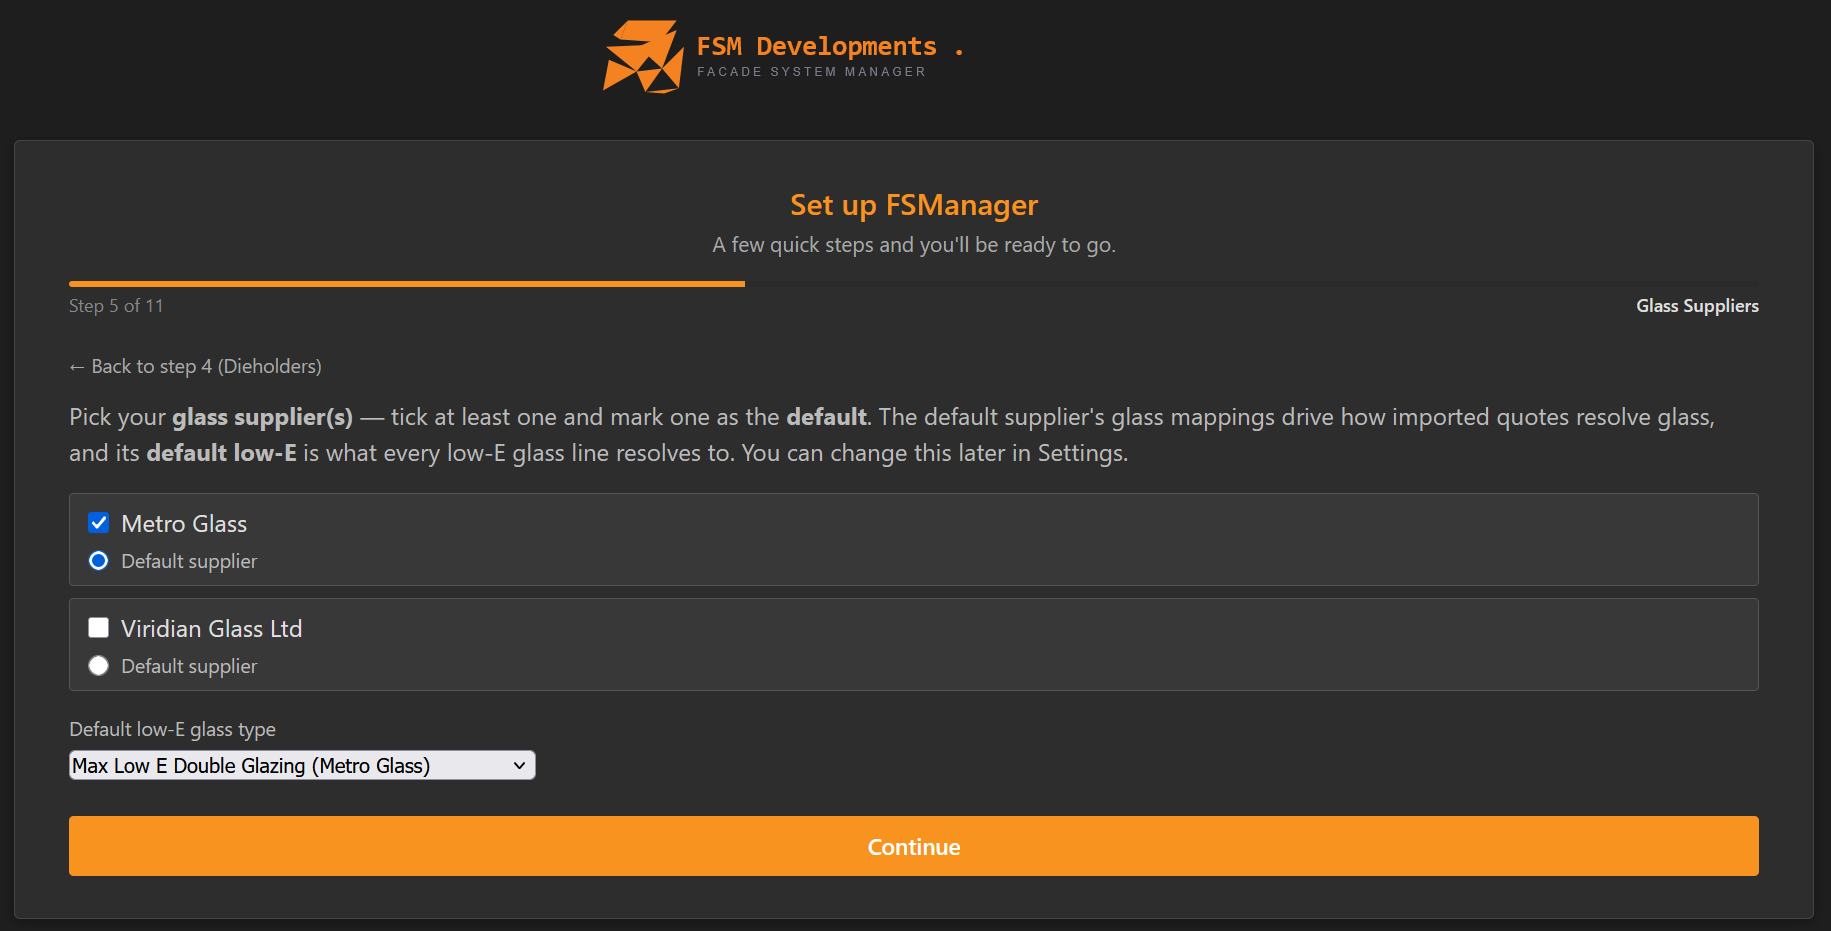
Step 5: Glass Suppliers
New in the latest wizard. Pick your glass supplier(s) — tick at least one and mark one as the default:
- The default supplier’s glass mappings drive how imported quotes resolve glass.
- Its default low-E is what every low-E glass line resolves to.
- Default low-E glass type — choose the specific product (e.g. Max Low E Double Glazing (Metro Glass)) that low-E lines should land on.
You can change all of this later in Settings.
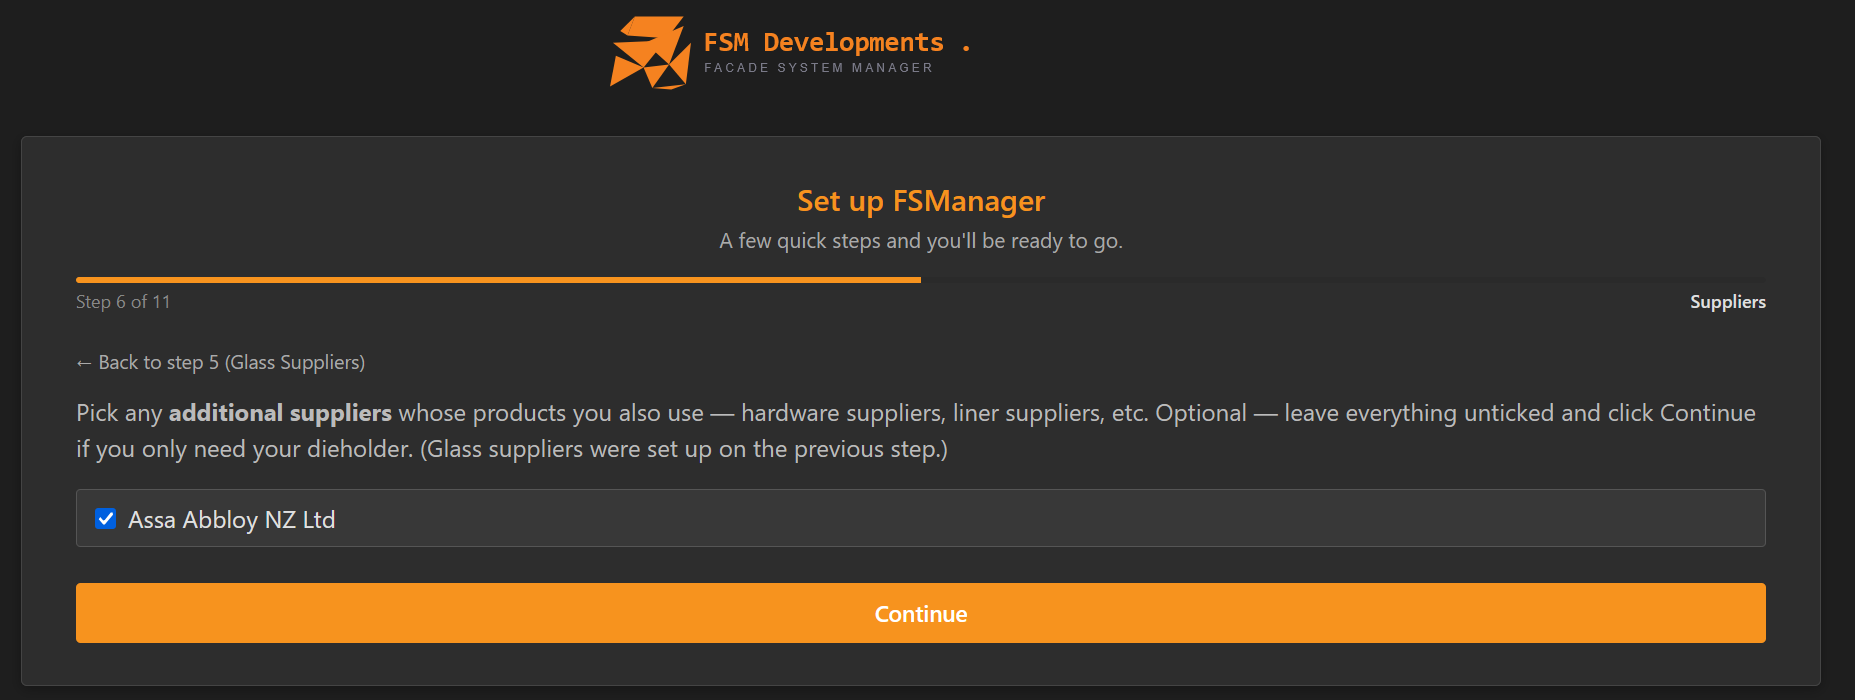
Step 6: Suppliers
Pick any additional suppliers whose products you also use — hardware suppliers, liner suppliers, etc. (Glass suppliers were handled on the previous step.)
Optional — leave everything unticked and click Continue if you only need your dieholder. More can be added later under Settings → Suppliers.
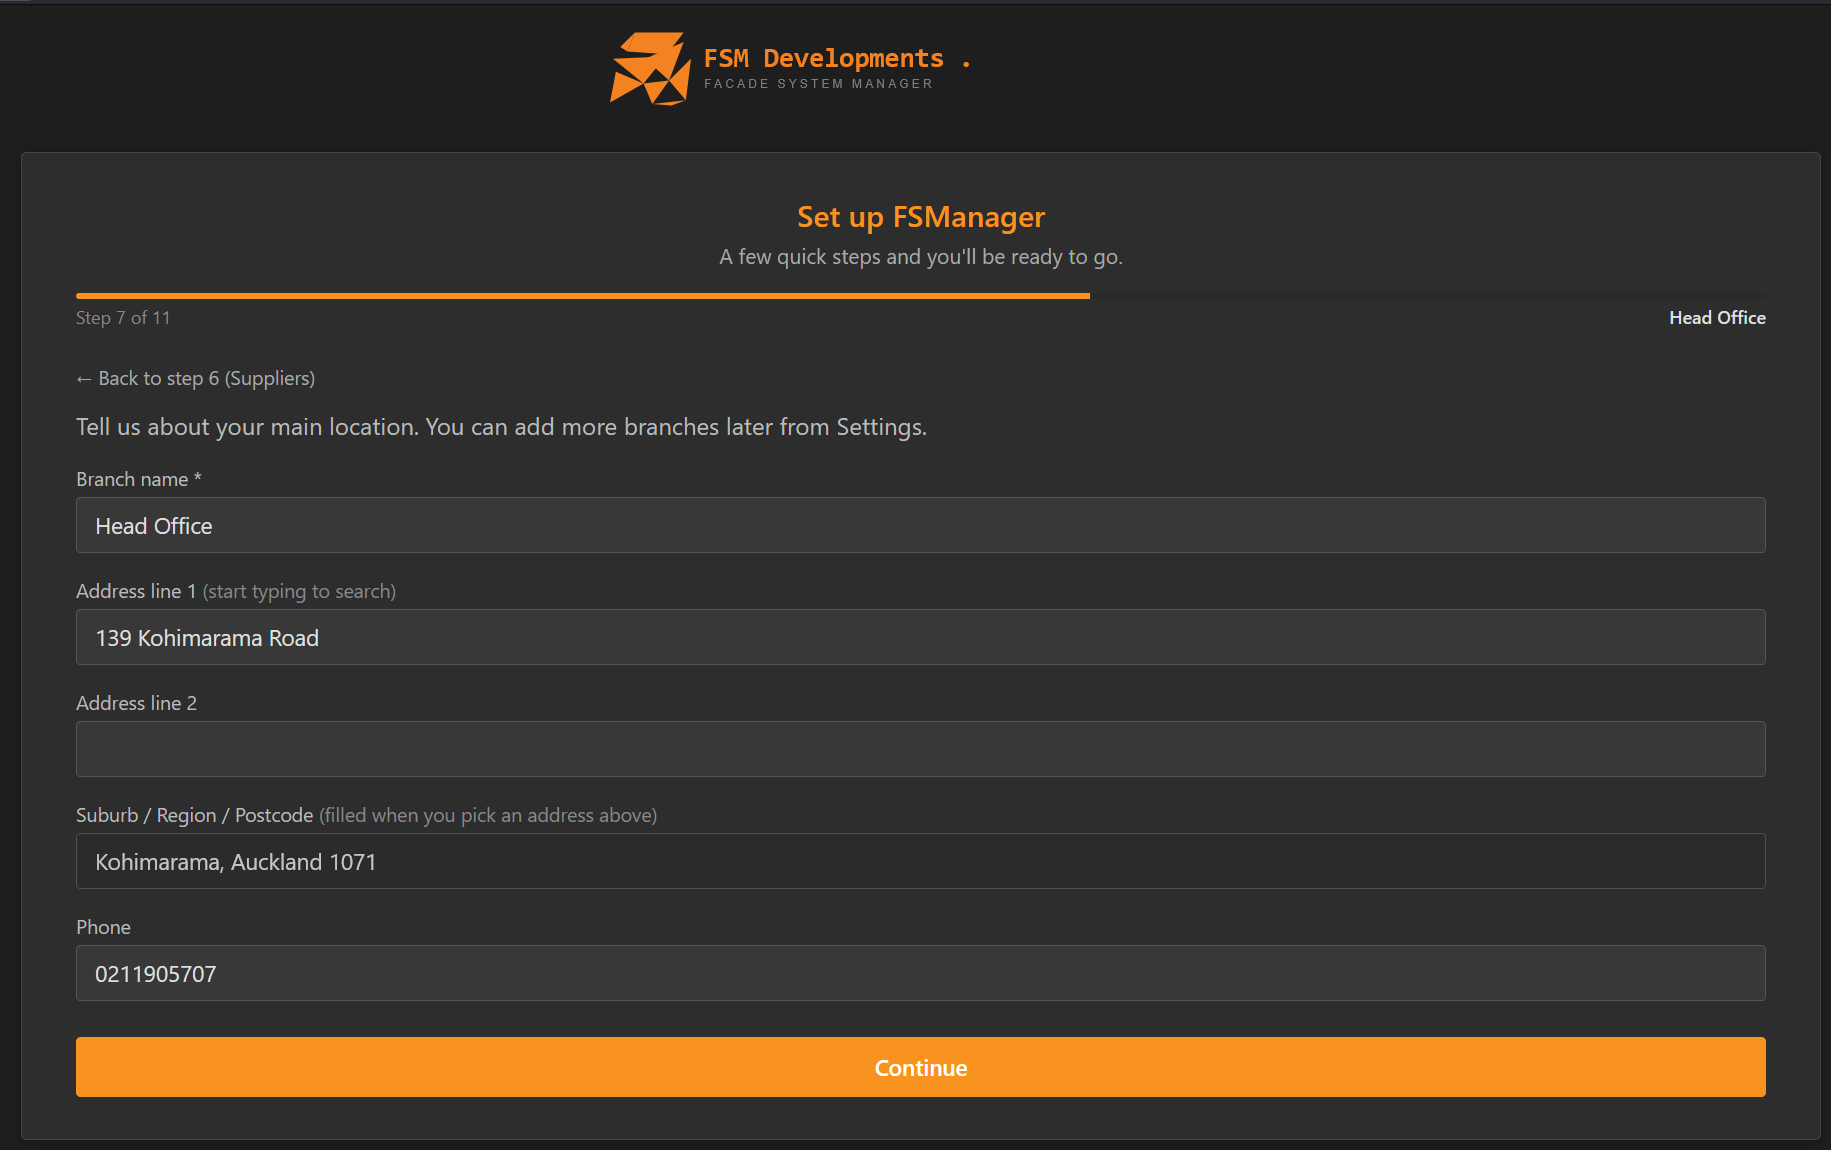
Step 7: Head Office
Your primary Branch — “Tell us about your main location. You can add more branches later from Settings.” Pre-filled with the Company address from Step 2:
- Branch name (required) — e.g. Head Office or Auckland.
- Address — start typing in Address line 1 to search; Suburb / Region / Postcode fills in when you pick a match.
- Phone — primary contact number for this site.
If you only operate from one location, this is your only Branch. Multi-site businesses add the others later under Settings → Branches.
Step 8: Departments
The standard departments for an aluminium-joinery shop come pre-seeded — Administration, Delivery, Manufacturing, Production, Sales, Site Work. Untick any you don’t use; they’ll stay in the system but won’t appear on employee dropdowns or org-chart views.
You can add custom departments later under Settings → Departments.

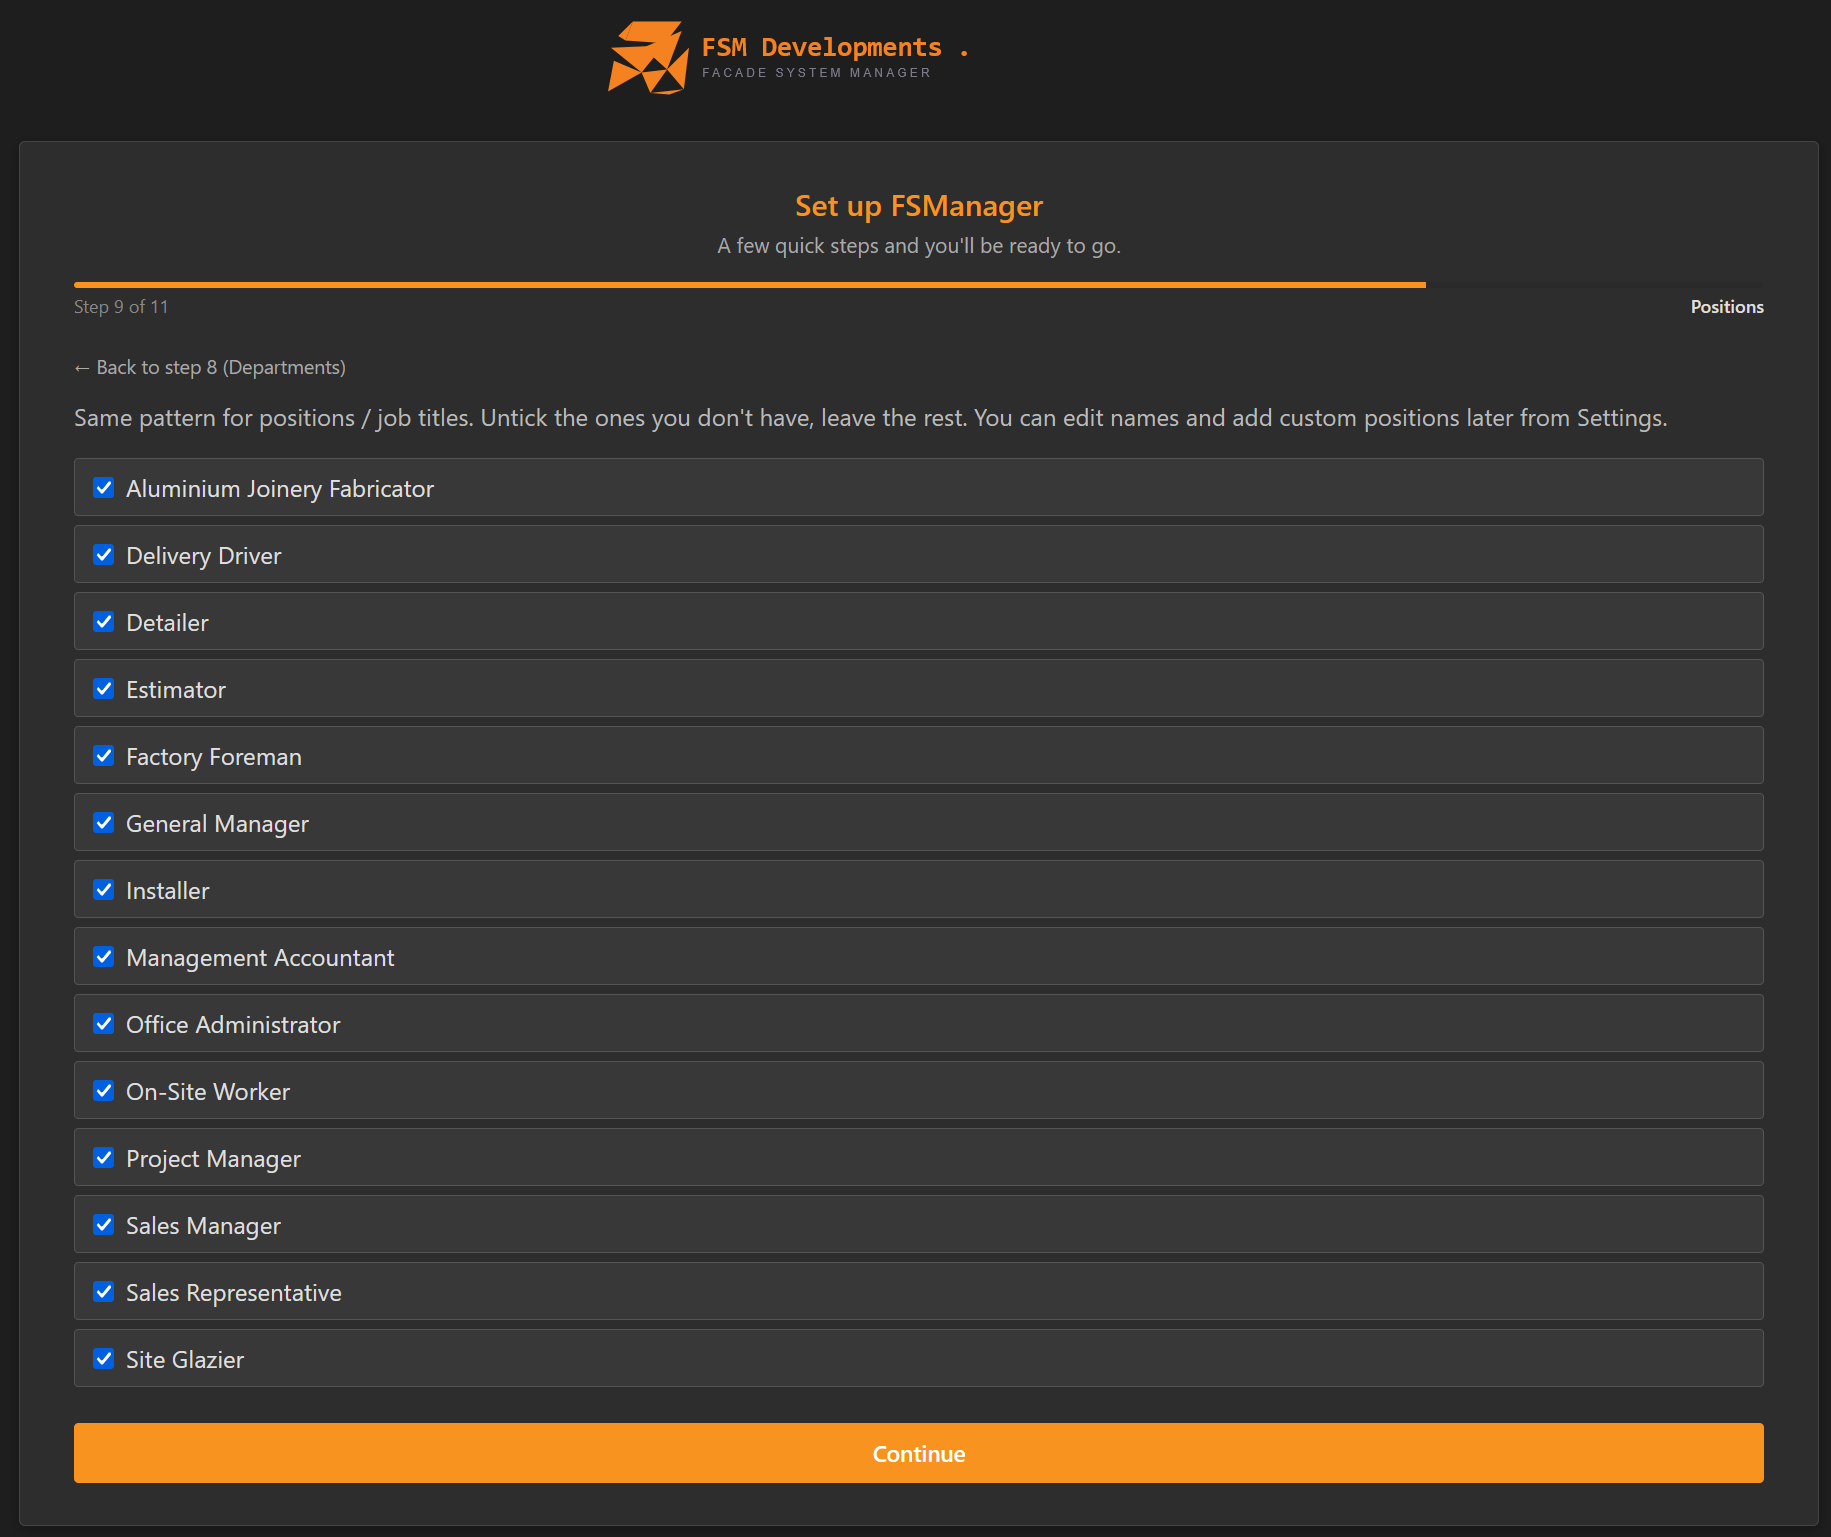
Step 9: Positions
Same pattern for positions / job titles — a pre-seeded list (Aluminium Joinery Fabricator, Delivery Driver, Detailer, Estimator, Factory Foreman, General Manager, Installer, Management Accountant, Office Administrator, On-Site Worker, Project Manager, Sales Manager, Sales Representative, Site Glazier). Untick the ones you don’t have, leave the rest. You can edit names and add custom positions later from Settings → Positions.
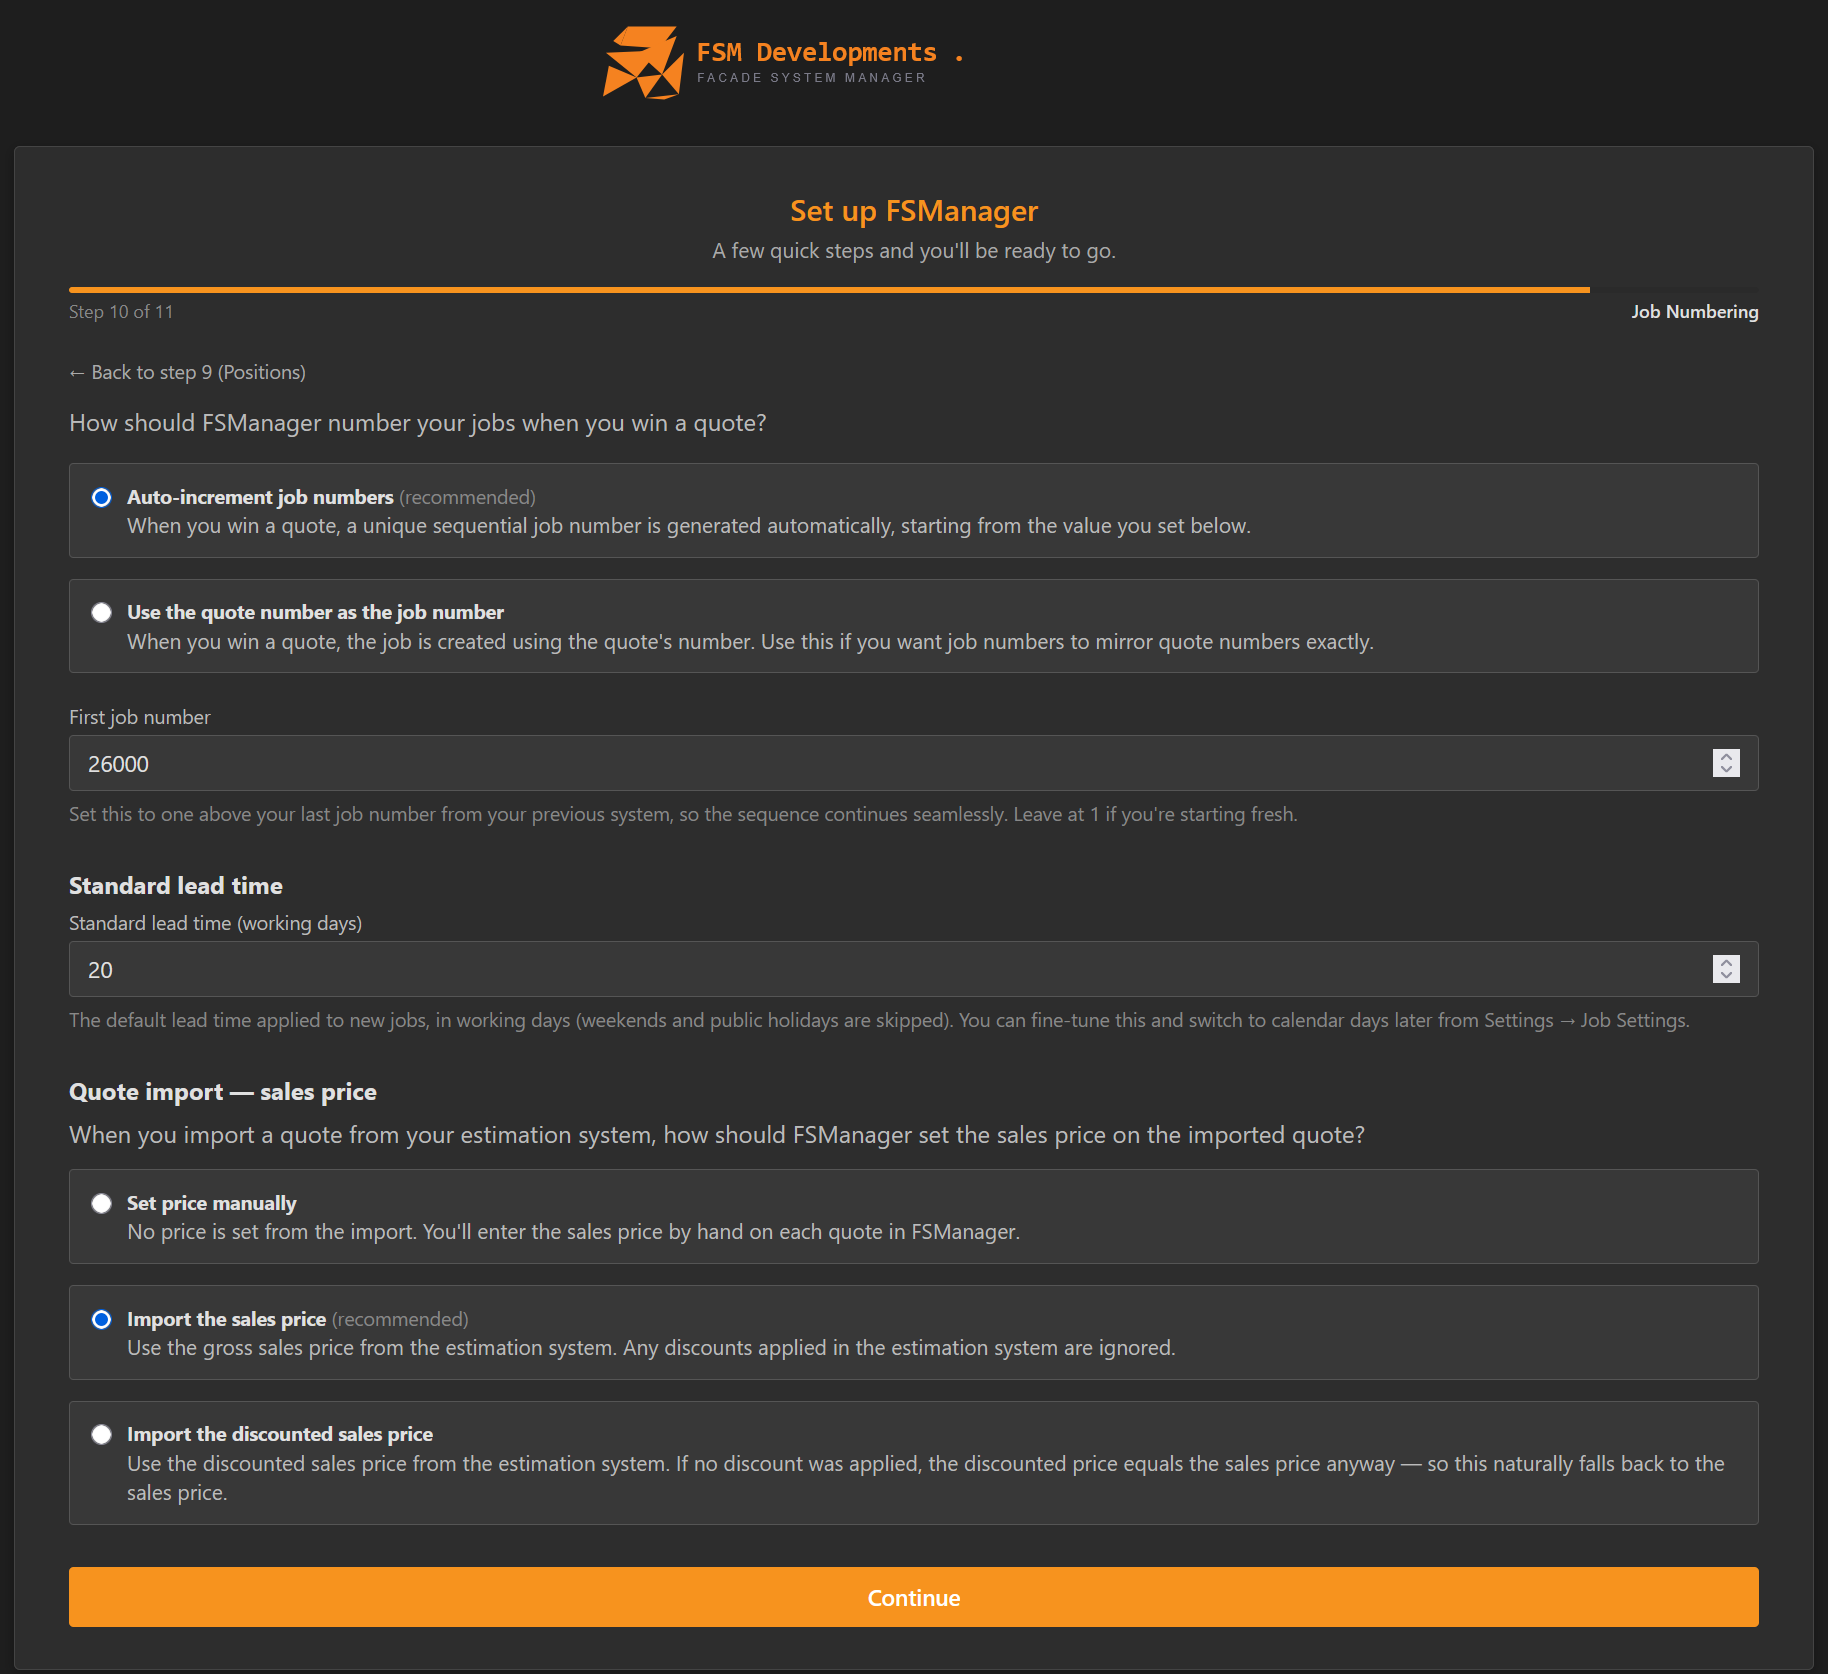
Step 10: Job Numbering
Three things on one screen — how jobs are numbered, the default lead time, and how imported quote prices behave.
How should FSManager number your jobs when you win a quote?
- Auto-increment job numbers (recommended) — when you win a quote, a unique sequential job number is generated automatically, starting from the value you set below.
- Use the quote number as the job number — the job is created using the quote’s number. Use this if you want job numbers to mirror quote numbers exactly.
- First job number — set this to one above your last job number from your previous system so the sequence continues seamlessly (e.g.
26000). Leave at1if you’re starting fresh.
Standard lead time (working days) — the default lead time applied to new jobs, in working days (weekends and public holidays are skipped). Defaults to 20. You can fine-tune this and switch to calendar days later from Settings → Job Settings.
Quote import — sales price (relevant if you use the quote importer for V6/X1 estimation files): how should FSManager set the sales price on an imported quote?
- Set price manually — no price is set from the import; you enter the sales price by hand on each quote.
- Import the sales price (recommended) — use the gross sales price from the estimation system; any discounts applied there are ignored.
- Import the discounted sales price — use the discounted sales price; if no discount was applied, the discounted price equals the sales price anyway, so this naturally falls back to it.
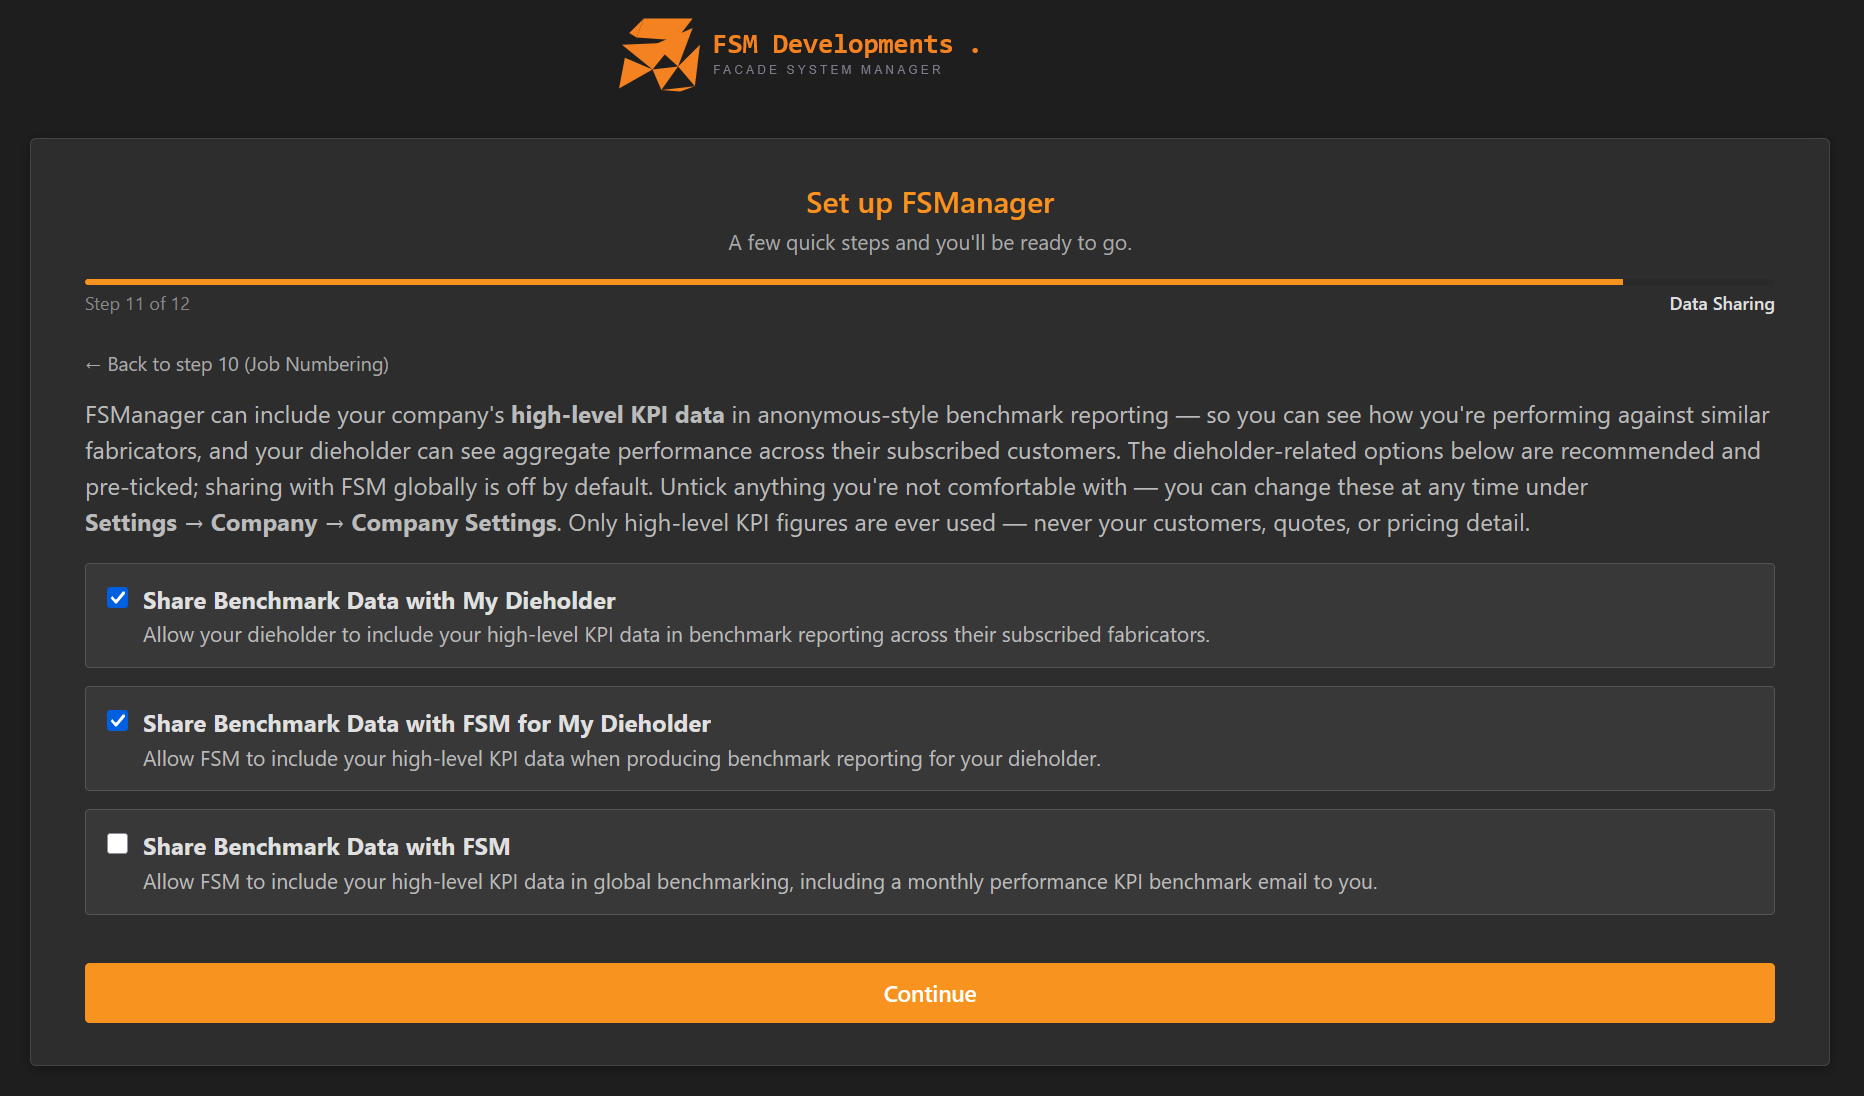
Step 11: Data Sharing
Opt in (or out) of anonymous-style benchmark reporting. FSManager can include your company’s high-level KPI figures in benchmark reporting — so you can see how you’re performing against similar fabricators, and your dieholder can see aggregate performance across their subscribed customers. Only high-level KPI figures are ever used — never your customers, quotes, or pricing detail.
Three independent toggles — the two dieholder options are recommended and pre-ticked; sharing with FSM globally is off by default. Untick anything you’re not comfortable with.
- Share Benchmark Data with My Dieholder (pre-ticked) — lets your dieholder include your high-level KPI data in benchmark reporting across their subscribed fabricators.
- Share Benchmark Data with FSM for My Dieholder (pre-ticked) — lets FSM include your high-level KPI data when producing that benchmark reporting for your dieholder.
- Share Benchmark Data with FSM (off by default) — lets FSM include your high-level KPI data in global benchmarking, and sends you a monthly performance KPI benchmark email.
You can change all three at any time under Settings → Company → Company Settings.
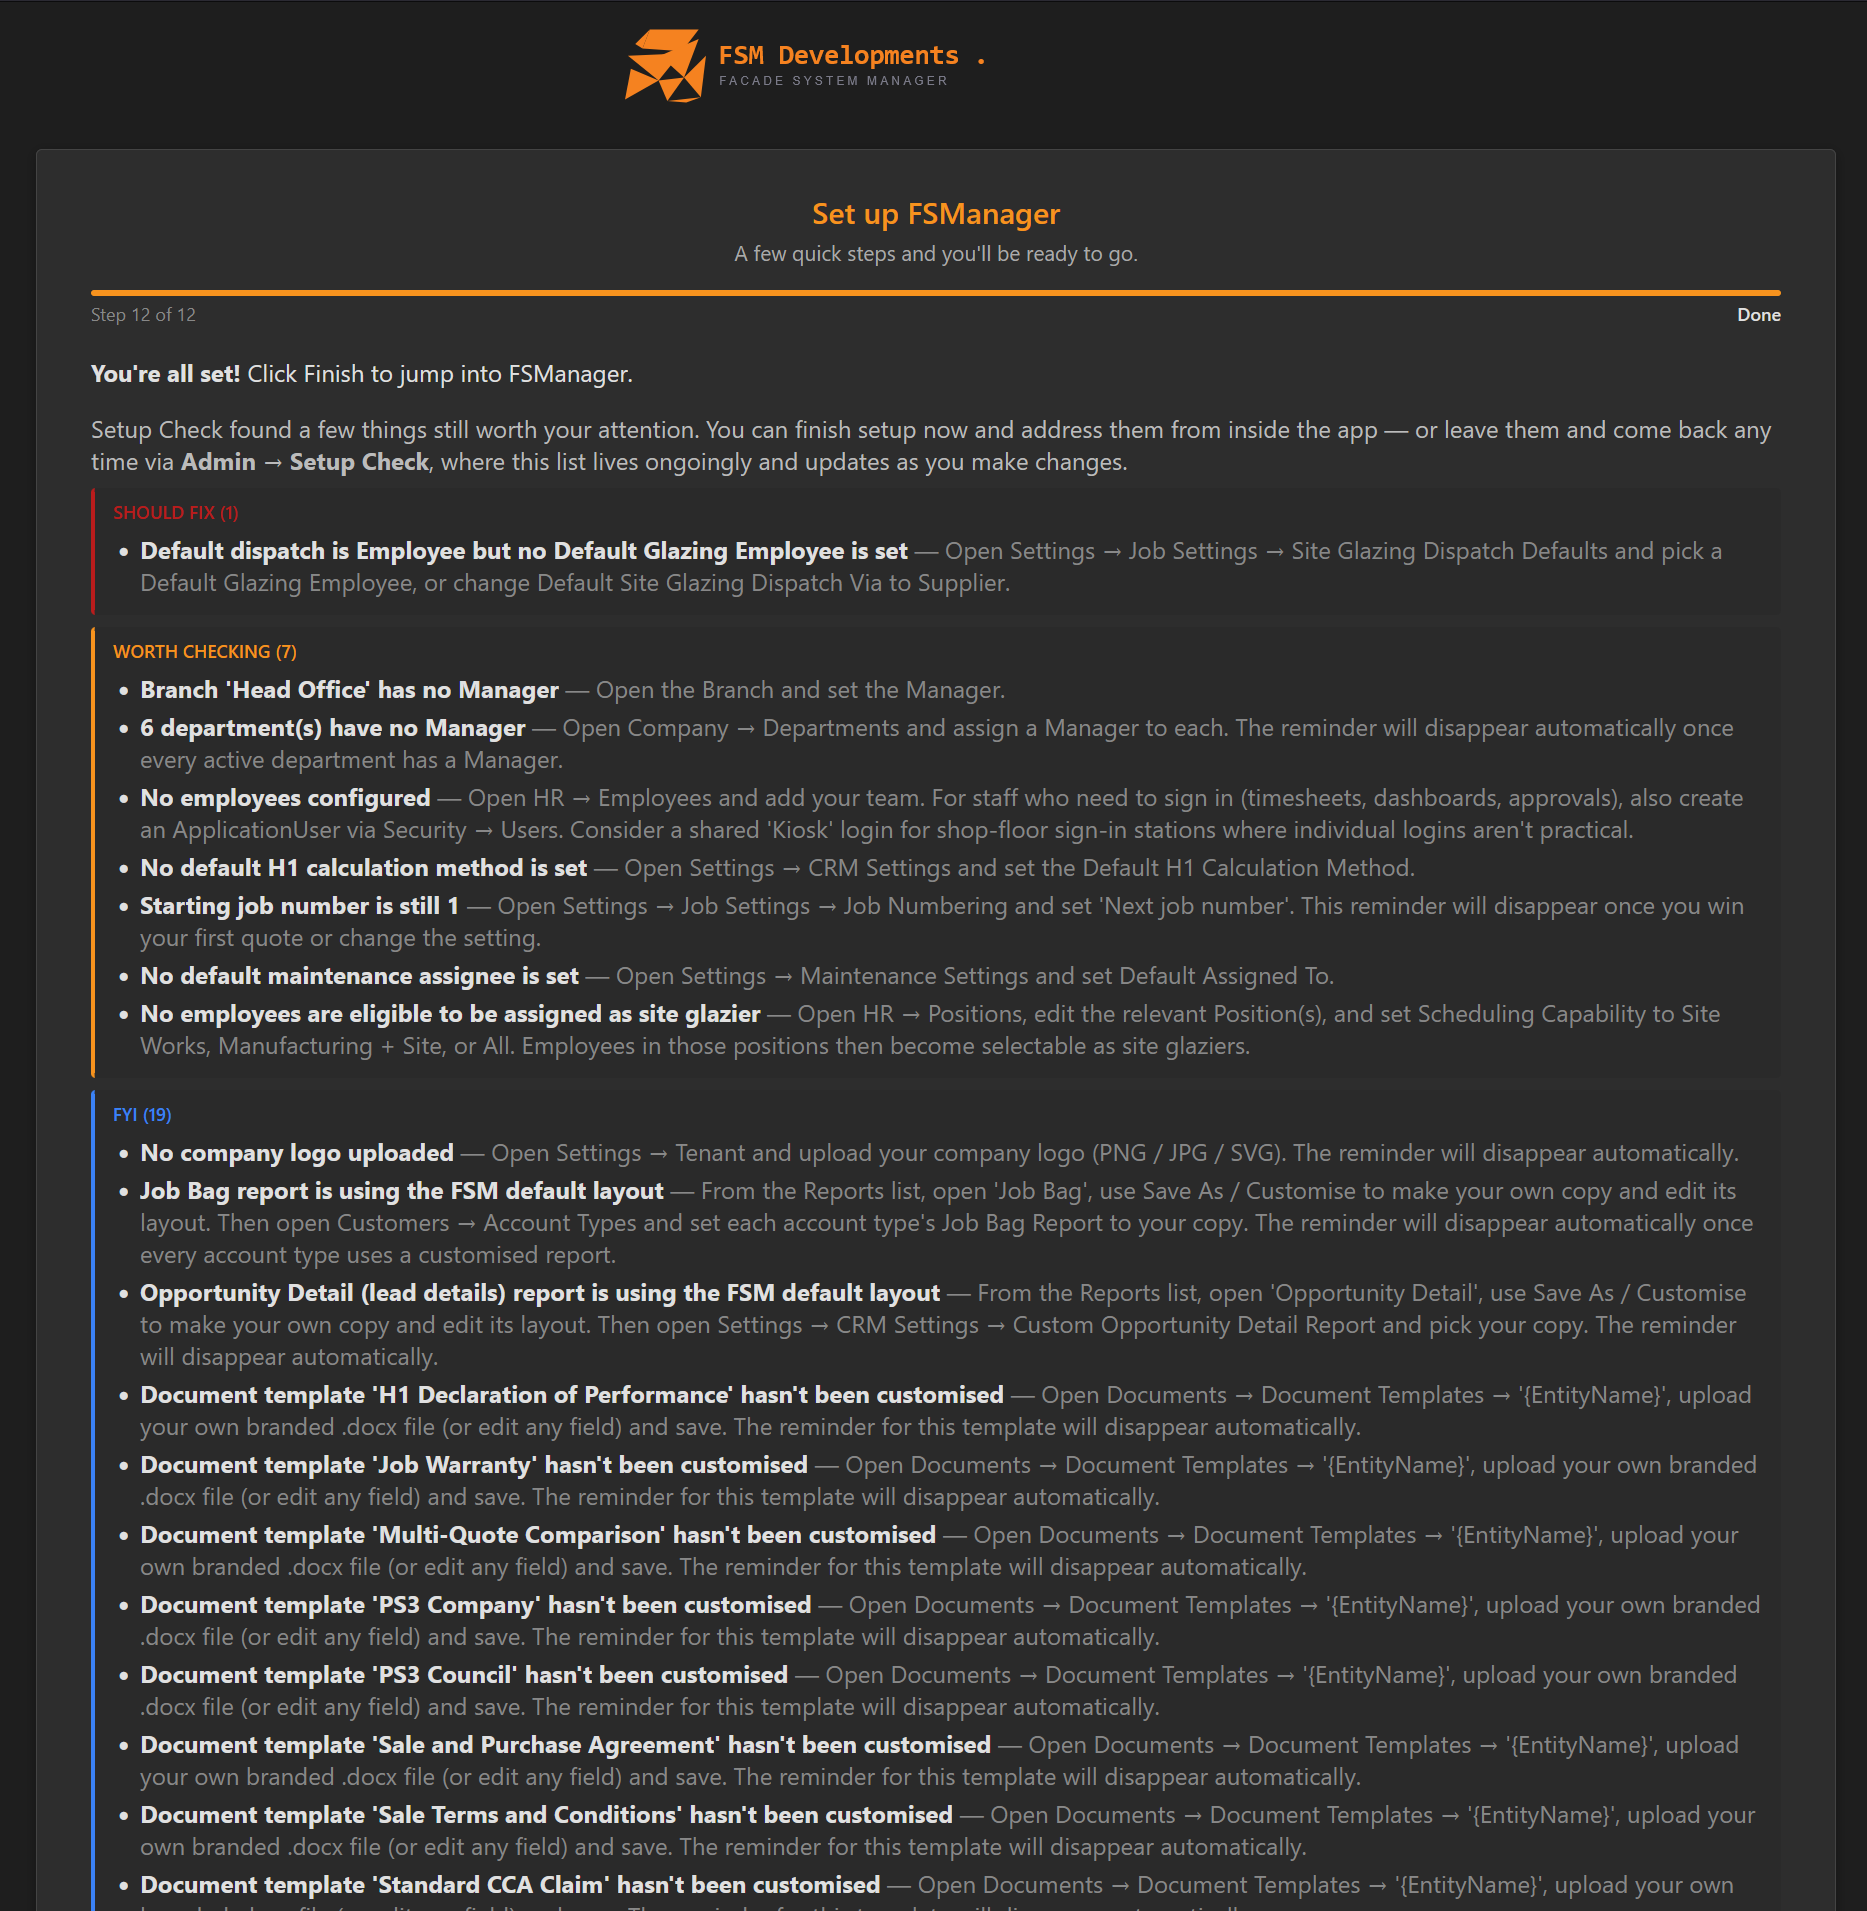
Step 12: Done
“You’re all set! Click Finish to jump into FSManager.”
Before you finish, the wizard runs Setup Check and lists anything still worth your attention, grouped by severity. You can finish now and address these from inside the app — or leave them and come back any time from the Setup Check page, which stays up to date as you make changes.
- 🔴 Should fix — things that distort day-to-day work. Examples: glass types with no default supplier (Specification → Glass Types — the Set Default Suppliers action applies one across all types at once); V6 import TBA colour mappings not set (Settings → Quote Importer Settings — map Fab 20 / 30 / 50, Group 2, Group 3 to standard colours); default dispatch is Employee but no Default Glazing Employee set.
- 🟠 Worth checking — warnings that may bite later. Examples: Head Office branch has no Manager; departments have no Manager; no employees configured (HR → Employees — and create an ApplicationUser under Security → Users for anyone who needs to sign in; consider a shared Kiosk login for shop-floor sign-in stations); no default H1 calculation method; no default maintenance assignee; no employees eligible as site glazier (set a Position’s Scheduling Capability to Site Works, Manufacturing + Site, or All).
- 🔵 FYI — defaults still in place. Examples: no company logo uploaded; reports still on the FSM default layout (Job Bag, Opportunity Detail); and document templates not yet customised (H1 Declaration of Performance, Job Warranty, Multi-Quote Comparison, PS3 Company, PS3 Council, Sale and Purchase Agreement, Sale Terms and Conditions, Standard CCA Claim) — open Documents → Document Templates and use Save As / Customise to upload your own branded copy. Each item clears itself once actioned.
Each item spells out exactly where to go and what to set. Click Finish when you’re ready — you’re dropped into the main app, and the Setup Check list stays accessible for anything you defer.
This is also where the welcome’s “add your team” lands — there’s no dedicated team step; employees are added afterwards from HR → Employees, nudged by the No employees configured Setup Check item above.
Re-running and revisiting
You can’t re-run the wizard end-to-end on the same tenant, but every individual step is editable in the regular Settings area:
| Wizard step | Where to change it later |
|---|---|
| Company (2) | Settings → Tenant |
| Logo (3) | Settings → Tenant |
| Dieholders (4) | Settings → Dieholders |
| Glass Suppliers (5) | Settings → Suppliers (glass defaults under Importer Settings) |
| Suppliers (6) | Settings → Suppliers |
| Head Office (7) | Settings → Branches |
| Departments (8) | Settings → Departments |
| Positions (9) | Settings → Positions |
| Job Numbering / lead time (10) | Settings → Job Settings |
| Data Sharing (11) | Settings → Company → Company Settings |
Use the Setup Check page to see what’s still missing and walk through fixing it.
Tips & gotchas
- Pick all your dieholders in Step 4, not just the main one. The cascade is faster when run once for all systems than retrofitted later — and you’ll inherit the full colour/glass/hardware catalogue with one click.
- Set the right default glass supplier in Step 5. The default and its default low-E decide how imported quote glass lines resolve — getting it right here saves correcting every imported quote later.
- Step 6 (Suppliers) is optional. If your dieholder and glass supplier cover everything, just click Continue.
- Logo can wait if you don’t have it ready. Skipping doesn’t break anything; it just means the placeholder shows in documents until you upload.
- Job numbering is sticky. Once jobs exist with auto-incremented numbers, switching to “use quote number” later creates a confusing mix. Make this decision deliberately — and set First job number to continue your old sequence.
- The Setup Check page is your friend after the wizard. Don’t ignore the issues that surface on the final step — they’re the system telling you what’s left to configure.
Related
- Your First Login — getting to the wizard
- System Settings — the per-area settings the wizard sets defaults for
- User Management — adding the rest of your team after setup