Skip to Content

Add a customer

Lite+

Creates a new customer record — the company or person you’ll raise opportunities, quotes and jobs against.

When to use

When a new enquiry comes in from someone you’ve never dealt with before, and you want them on the system before raising an opportunity.

Step by step
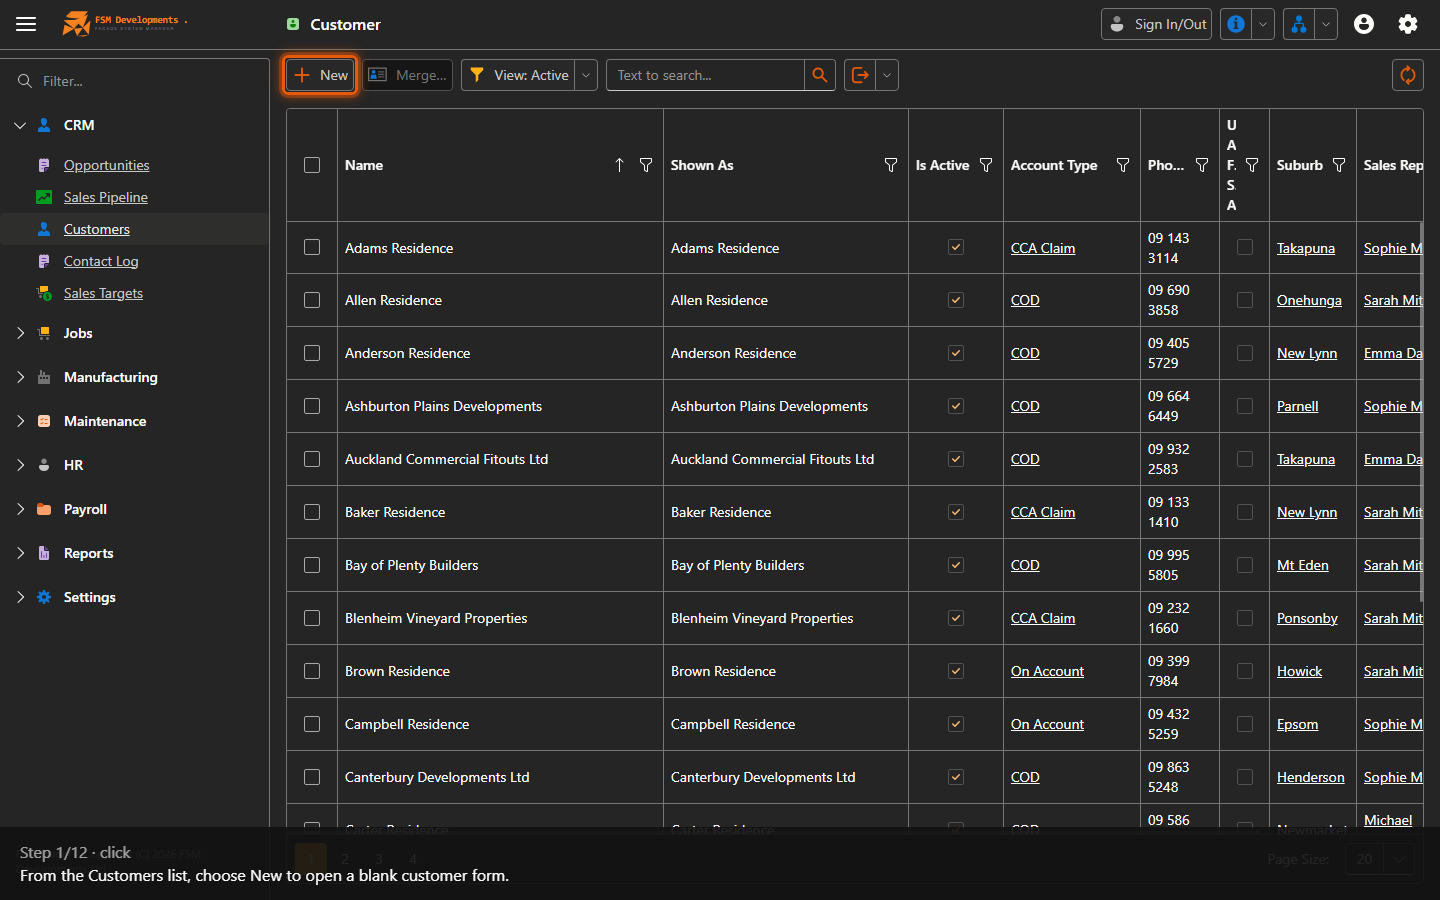
New (toolbar button)
1. From the Customers list, choose New to open a blank customer form.
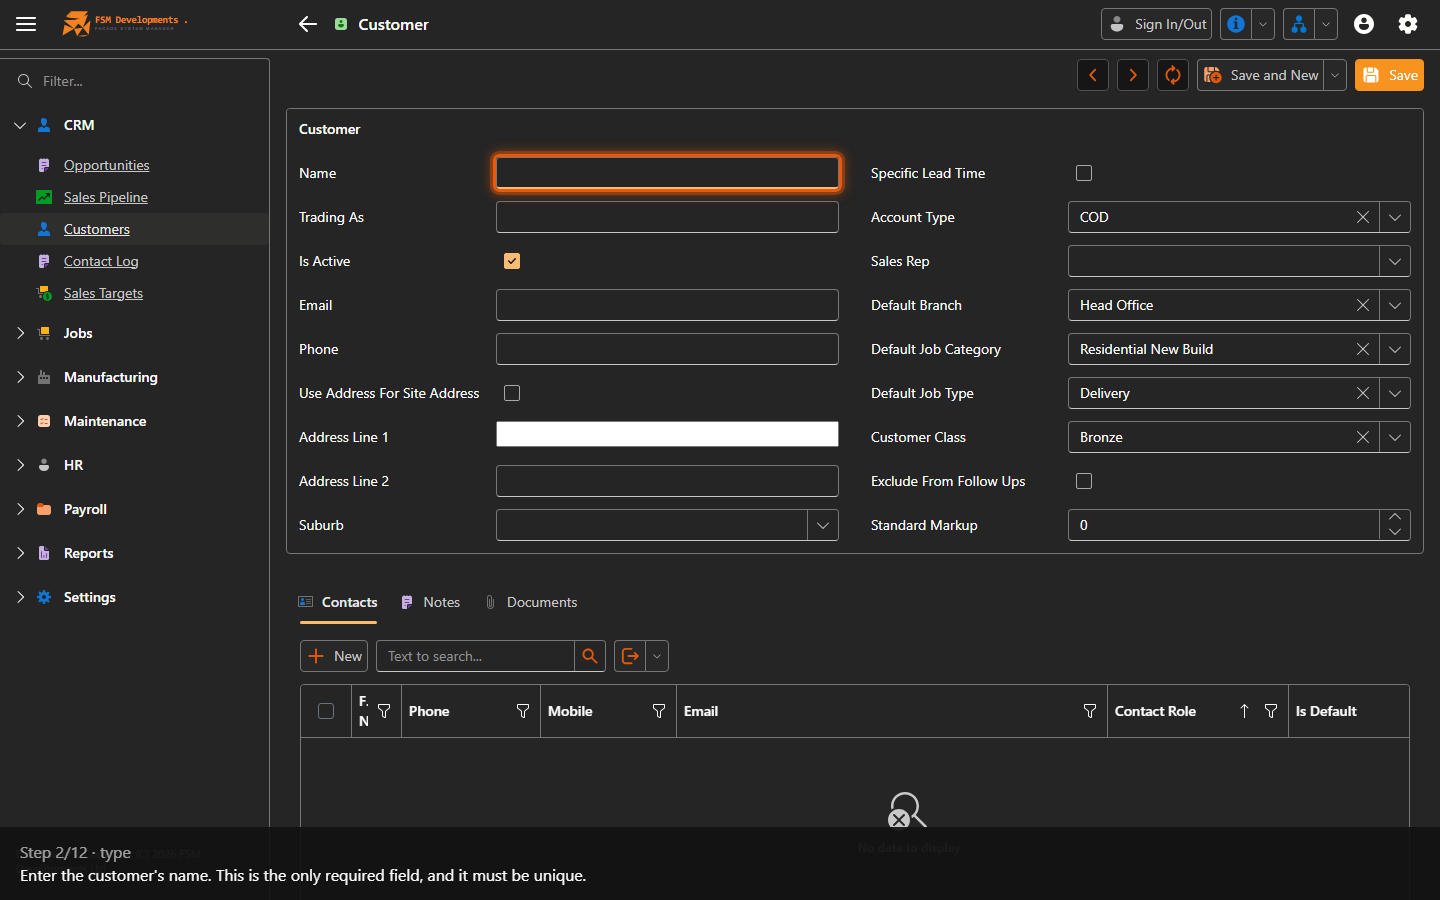
Name (textbox)
2. Enter the customer's name. This is the only required field, and it must be unique.
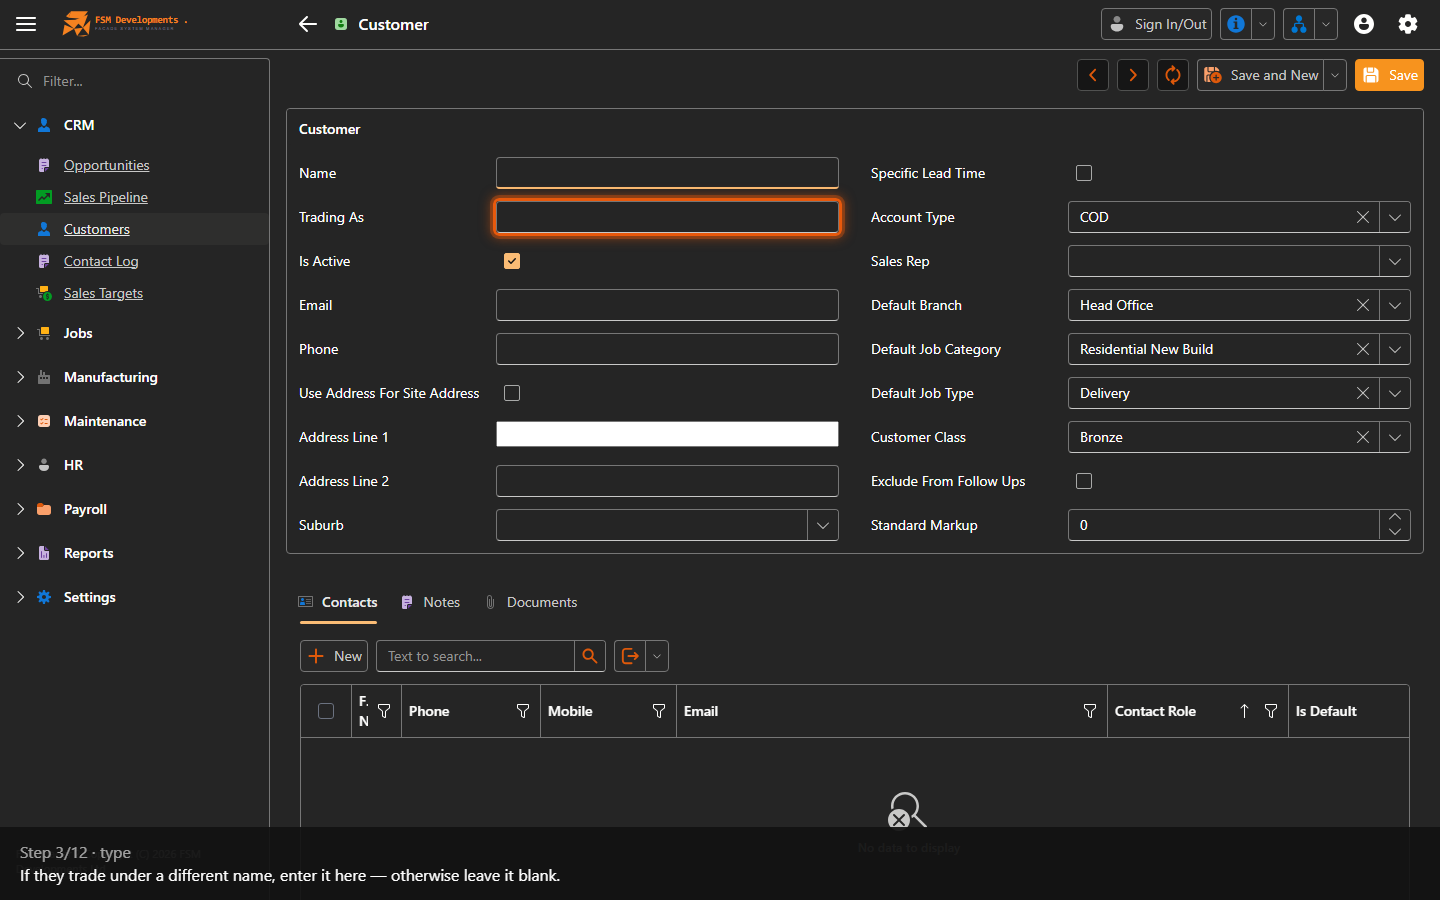
Trading As (textbox)
3. If they trade under a different name, enter it here — otherwise leave it blank.
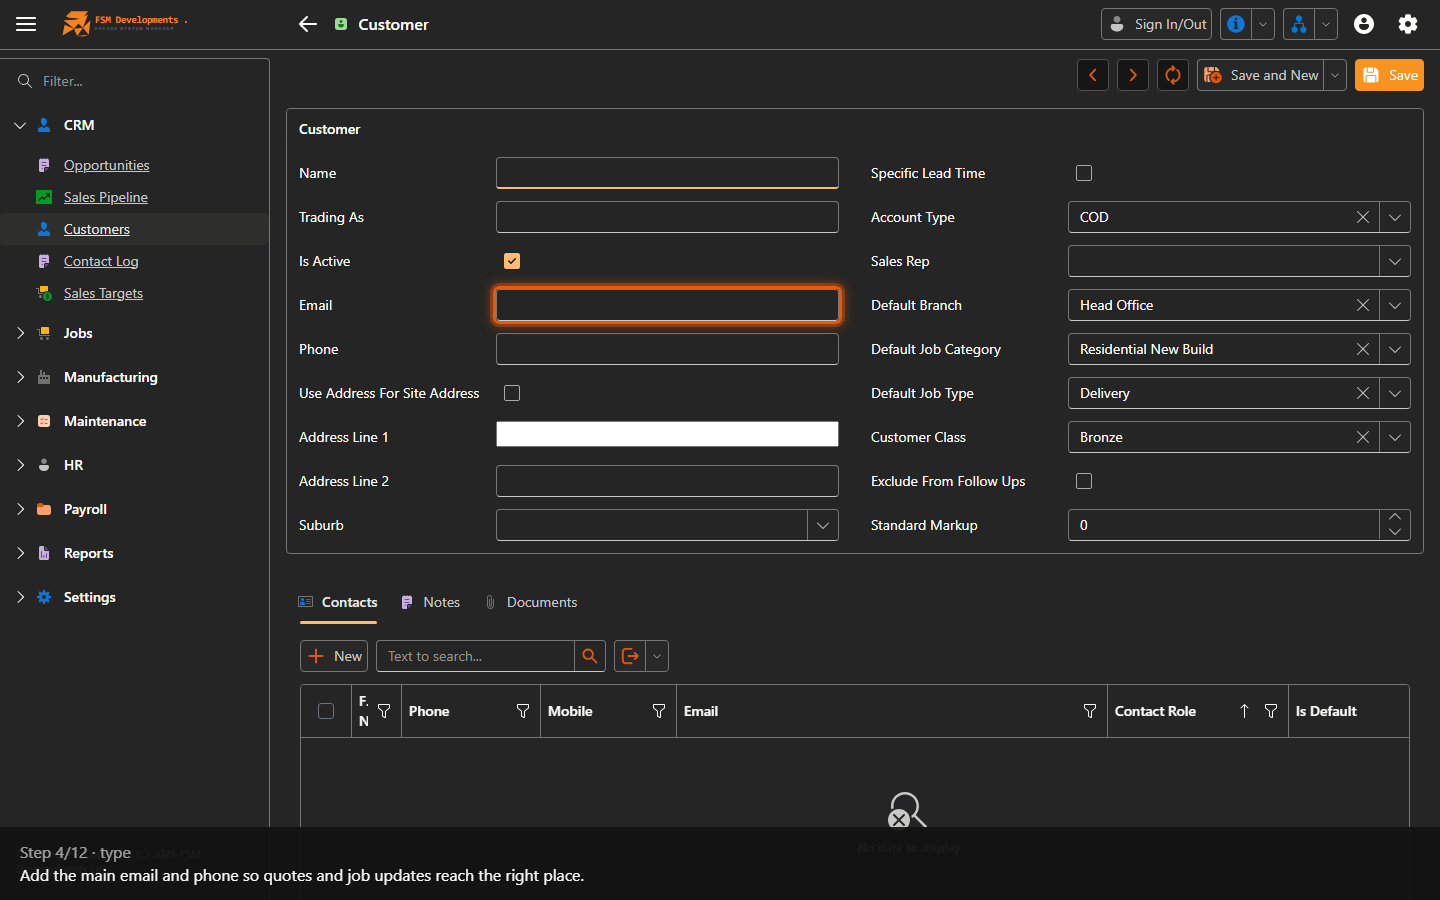
Email (textbox)
4. Add the main email and phone so quotes and job updates reach the right place.
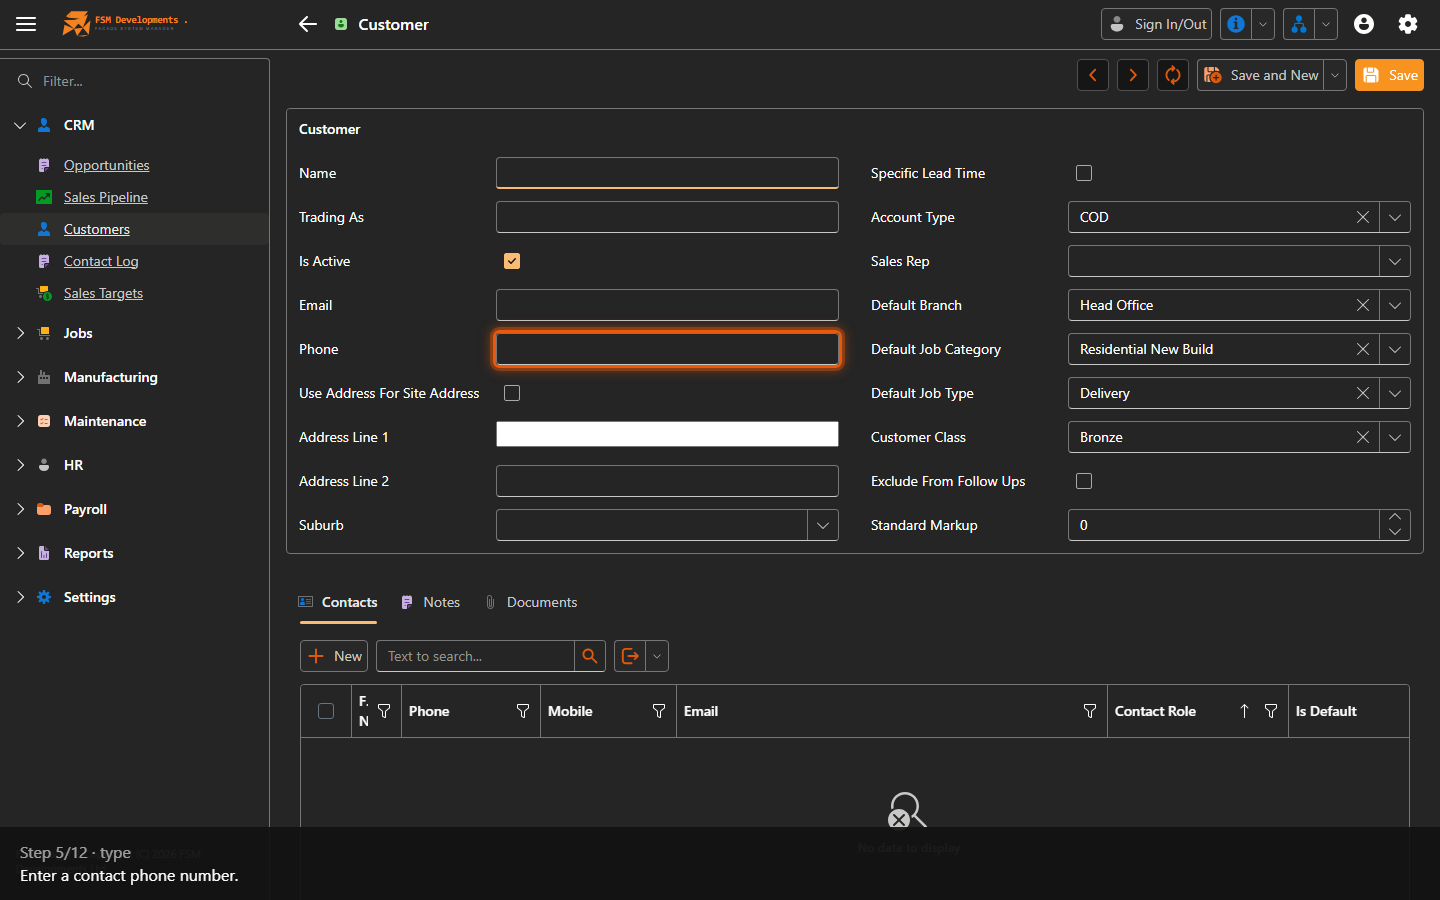
Phone (textbox)
5. Enter a contact phone number.
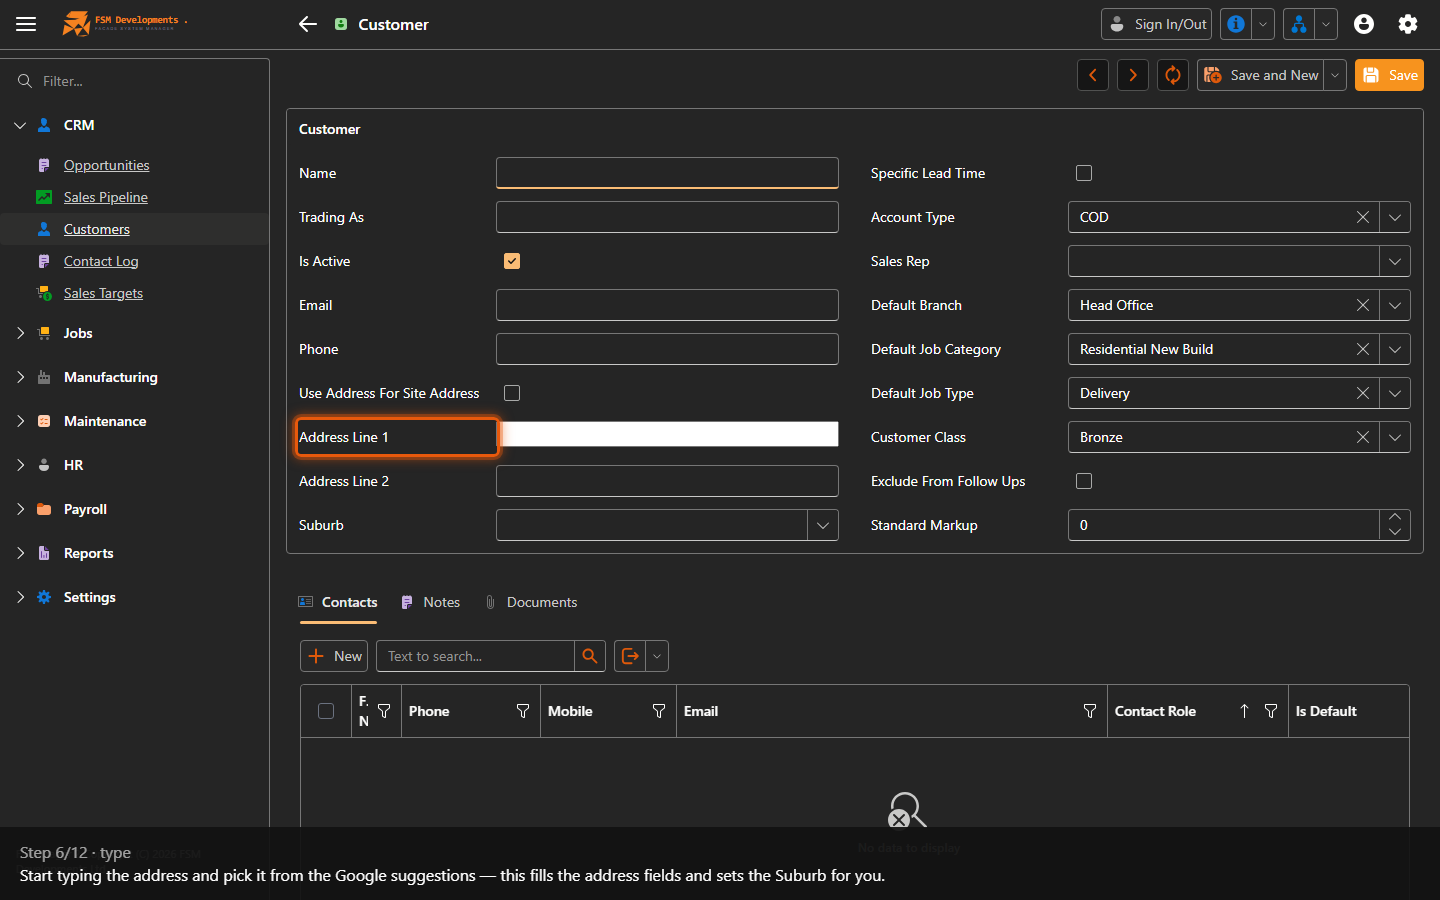
Address Line 1 (textbox)
6. Start typing the address and pick it from the Google suggestions — this fills the address fields and sets the Suburb for you.
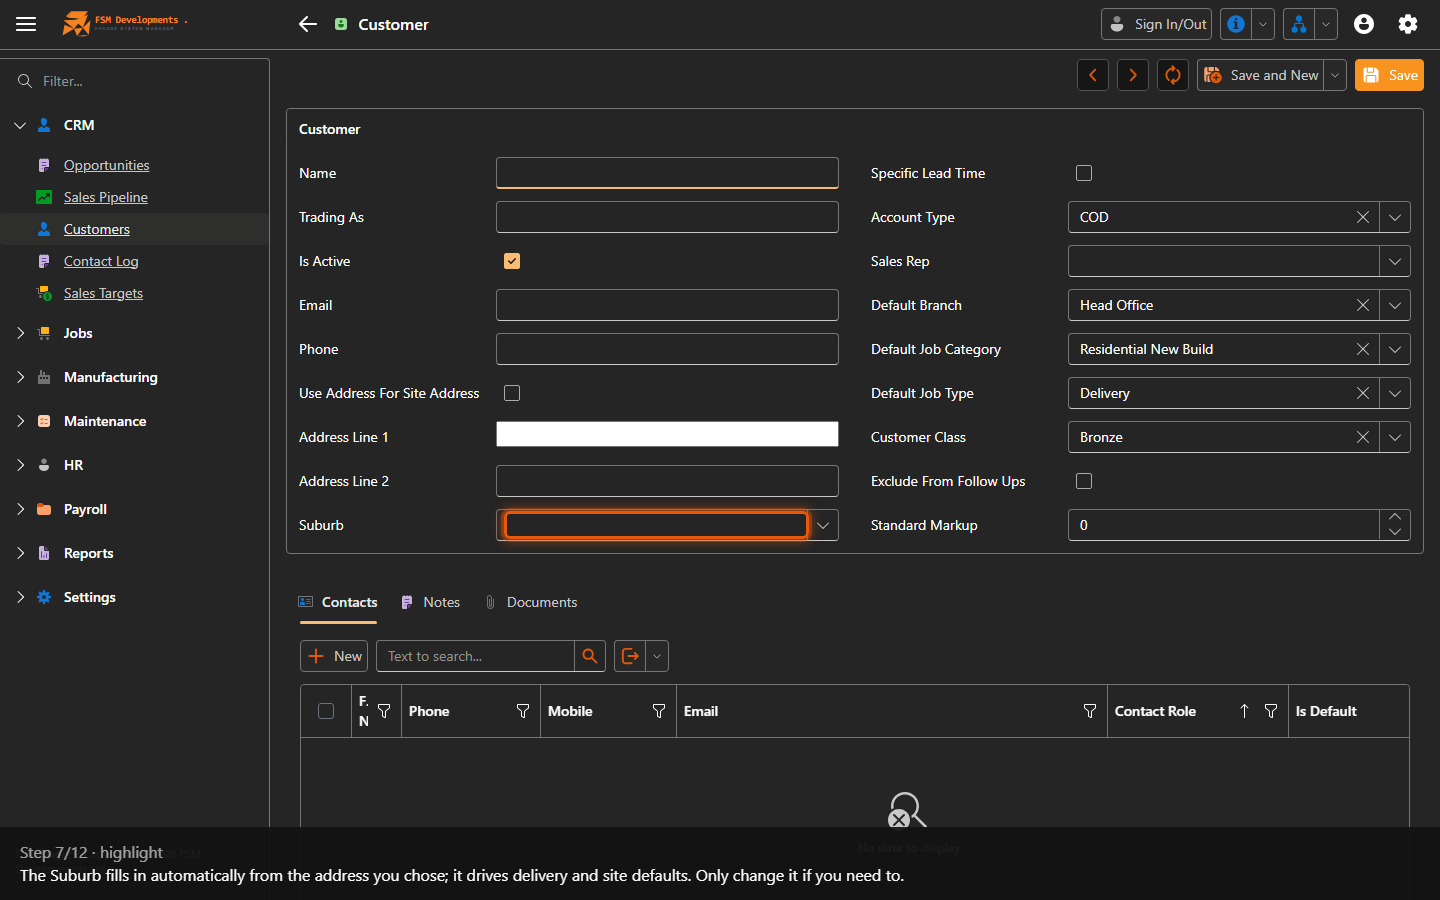
Suburb (lookup)
7. The Suburb fills in automatically from the address you chose; it drives delivery and site defaults. Only change it if you need to.
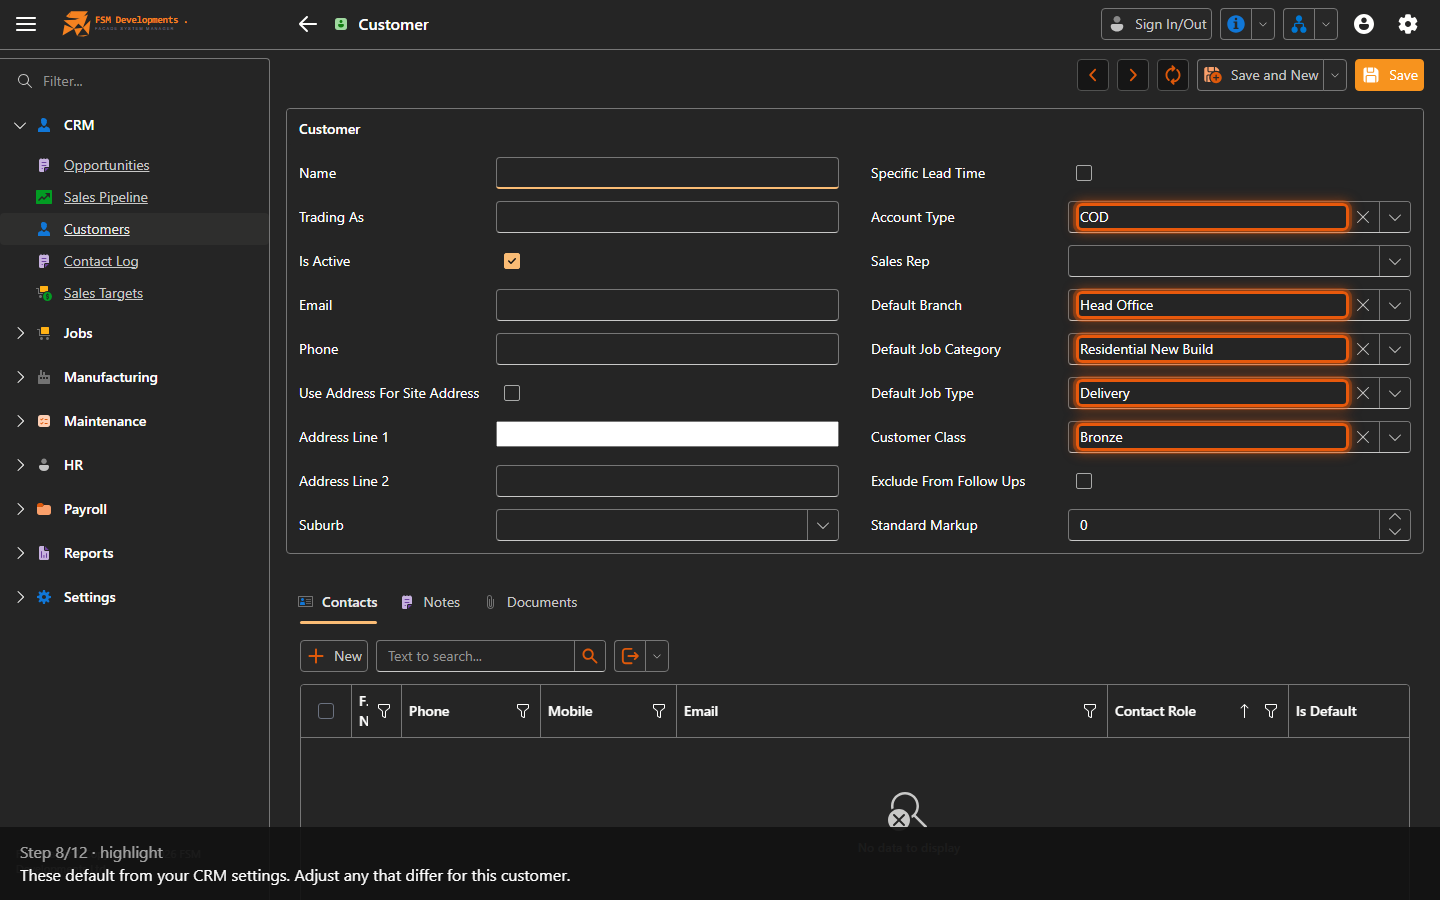
Account Type, Default Branch, Default Job Category, Default Job Type, Customer Class (lookups)
8. These default from your CRM settings. Adjust any that differ for this customer.
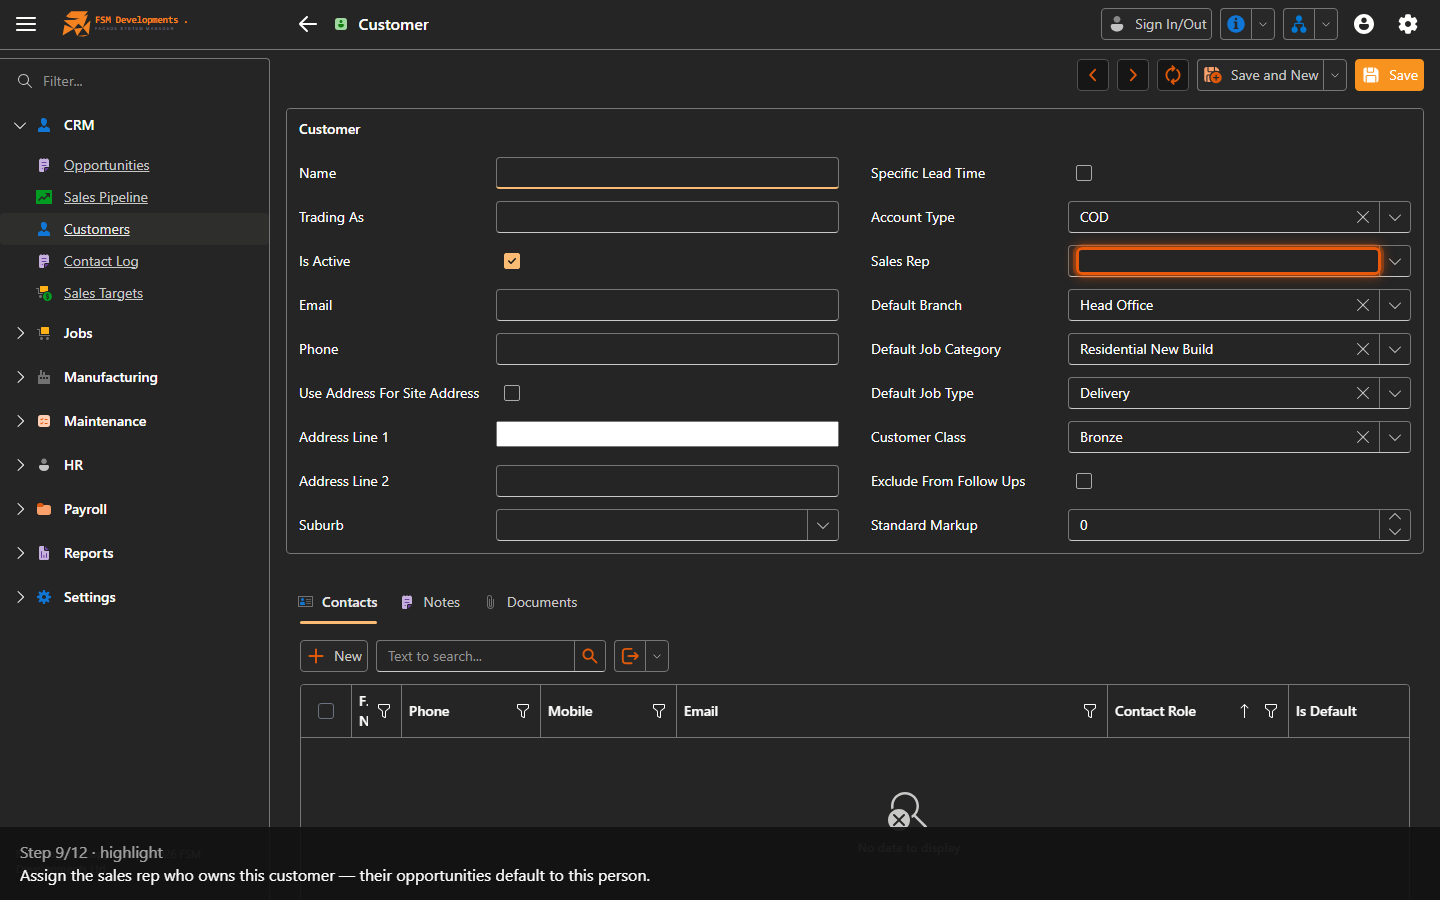
Sales Rep (lookup)
9. Assign the sales rep who owns this customer — their opportunities default to this person.
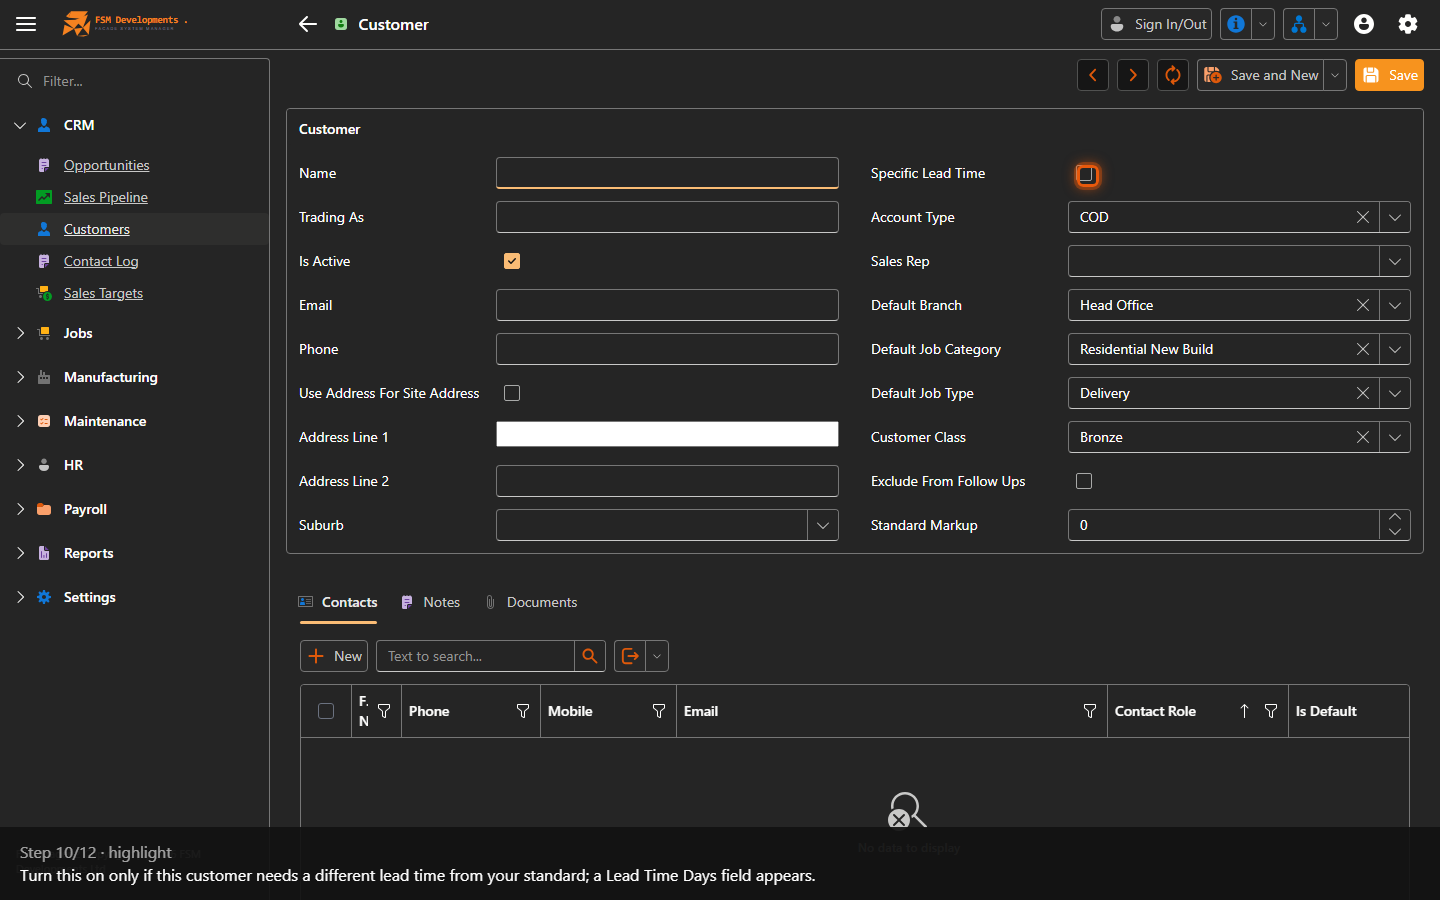
Specific Lead Time (checkbox)
10. Turn this on only if this customer needs a different lead time from your standard; a Lead Time Days field appears.
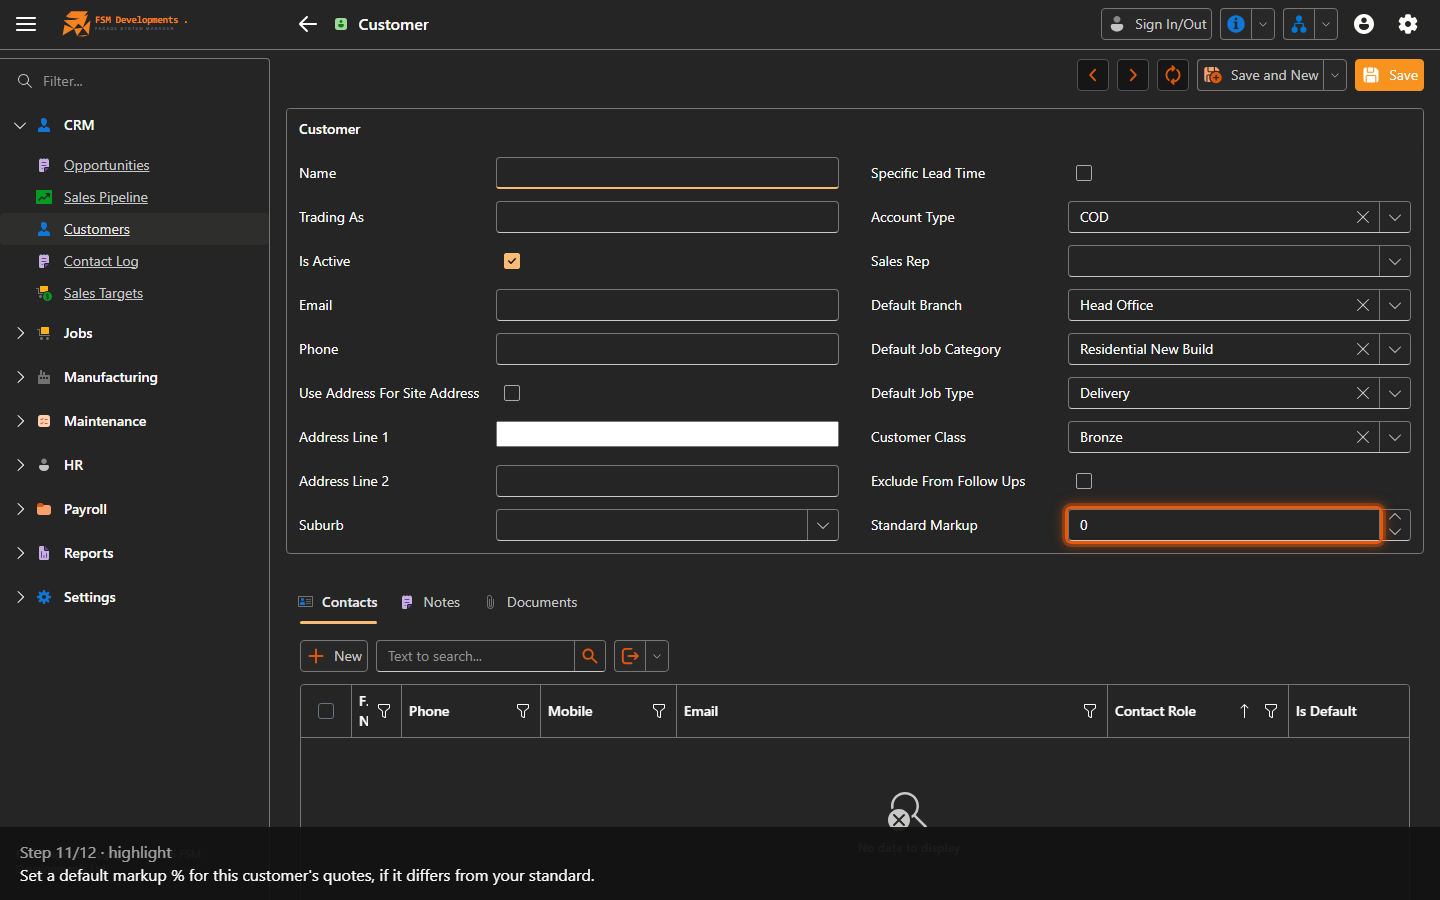
Standard Markup (spin button)
11. Set a default markup % for this customer's quotes, if it differs from your standard.
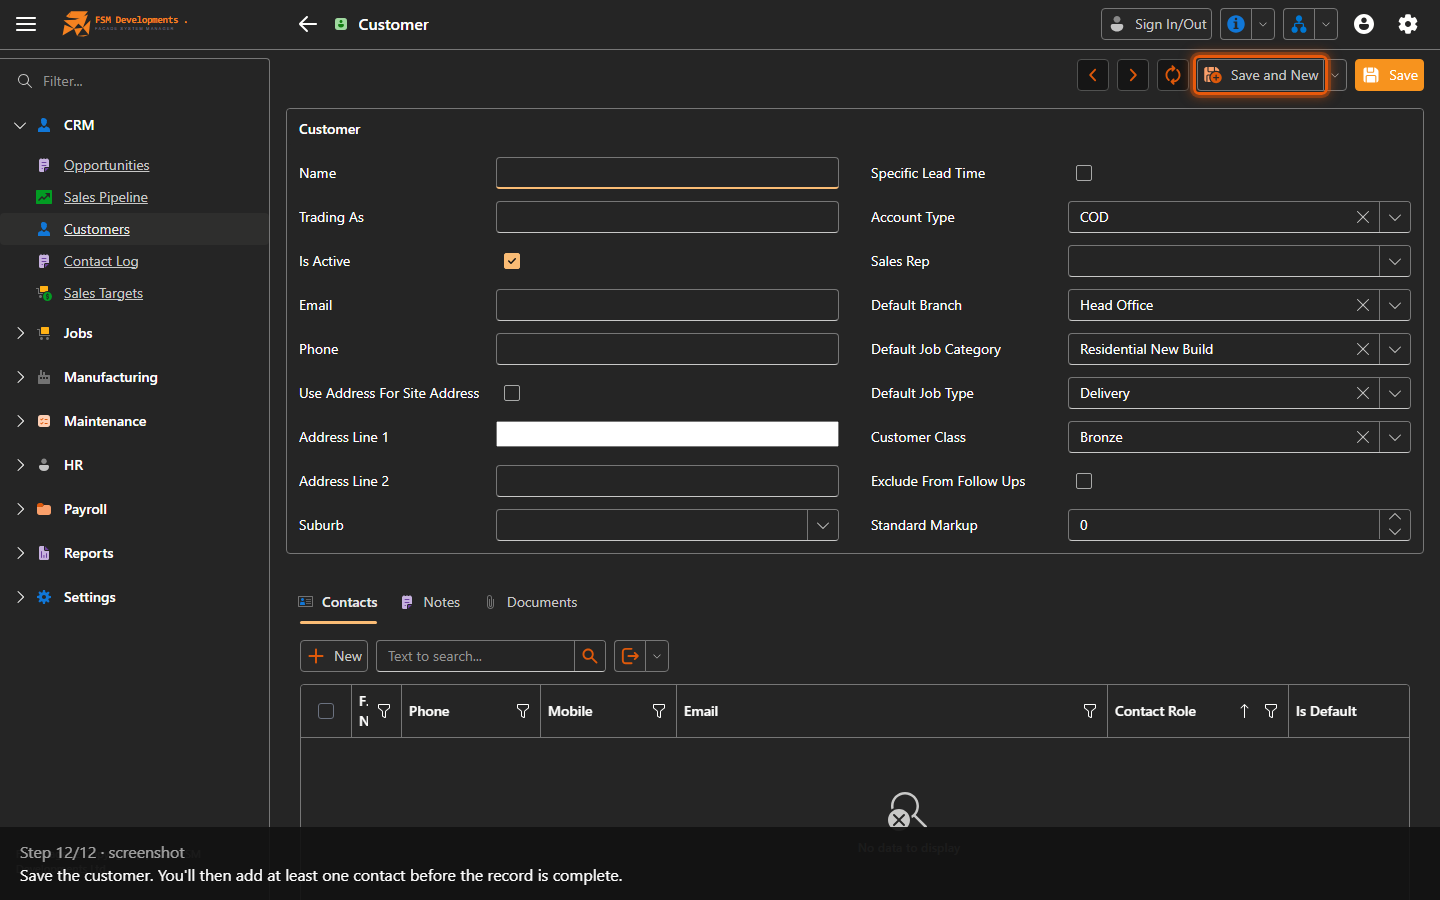
Save (toolbar button)
12. Save the customer. You'll then add at least one contact before the record is complete.
Last updated on