Skip to Content
How-to (step by step)CustomersManage customer contacts

Manage customer contacts

Lite+

The people you actually deal with at a customer — the director, the project manager, the site contact. Each customer keeps its own list of contacts, with one marked as the default.

When to use

Setting up a new customer (every customer needs at least one contact), or when your day-to-day contact at a company changes.

Step by step
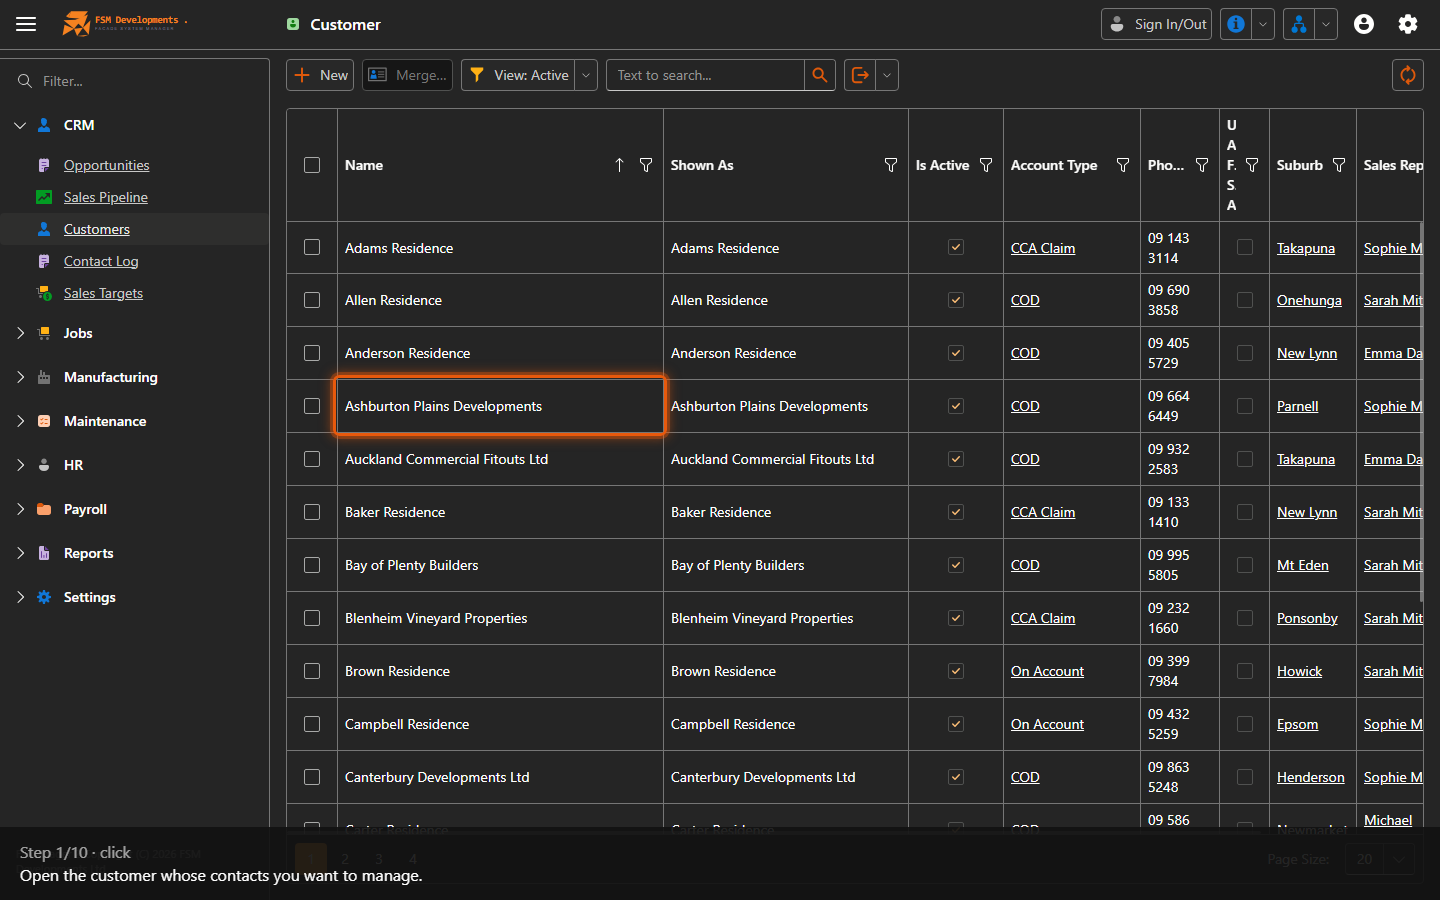
A customer row, e.g. 'Ashburton Plains Developments'
1. Open the customer whose contacts you want to manage.
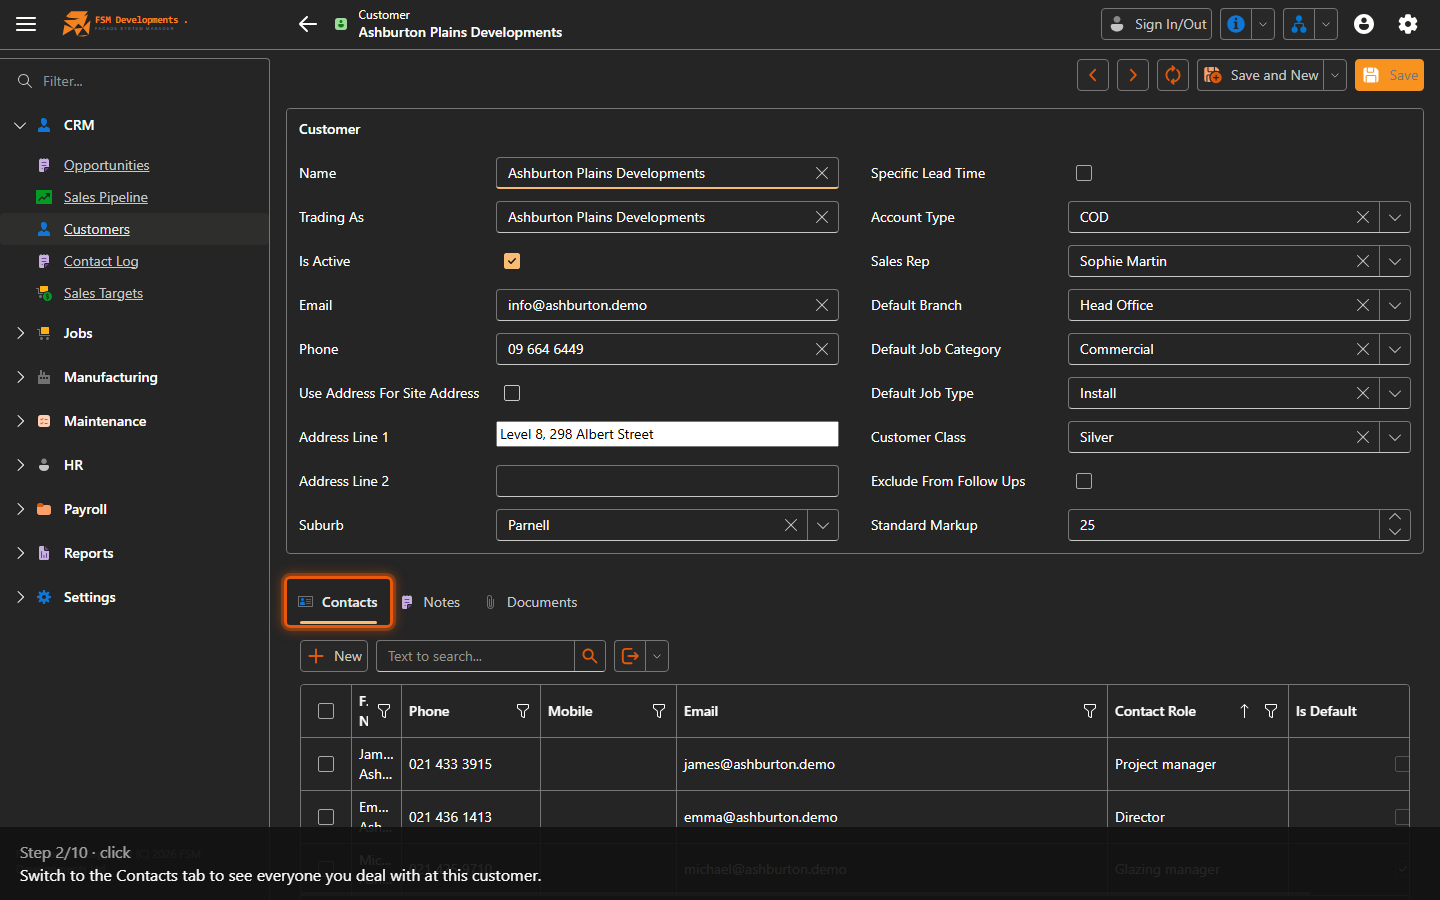
Contacts (tab)
2. Switch to the Contacts tab to see everyone you deal with at this customer.
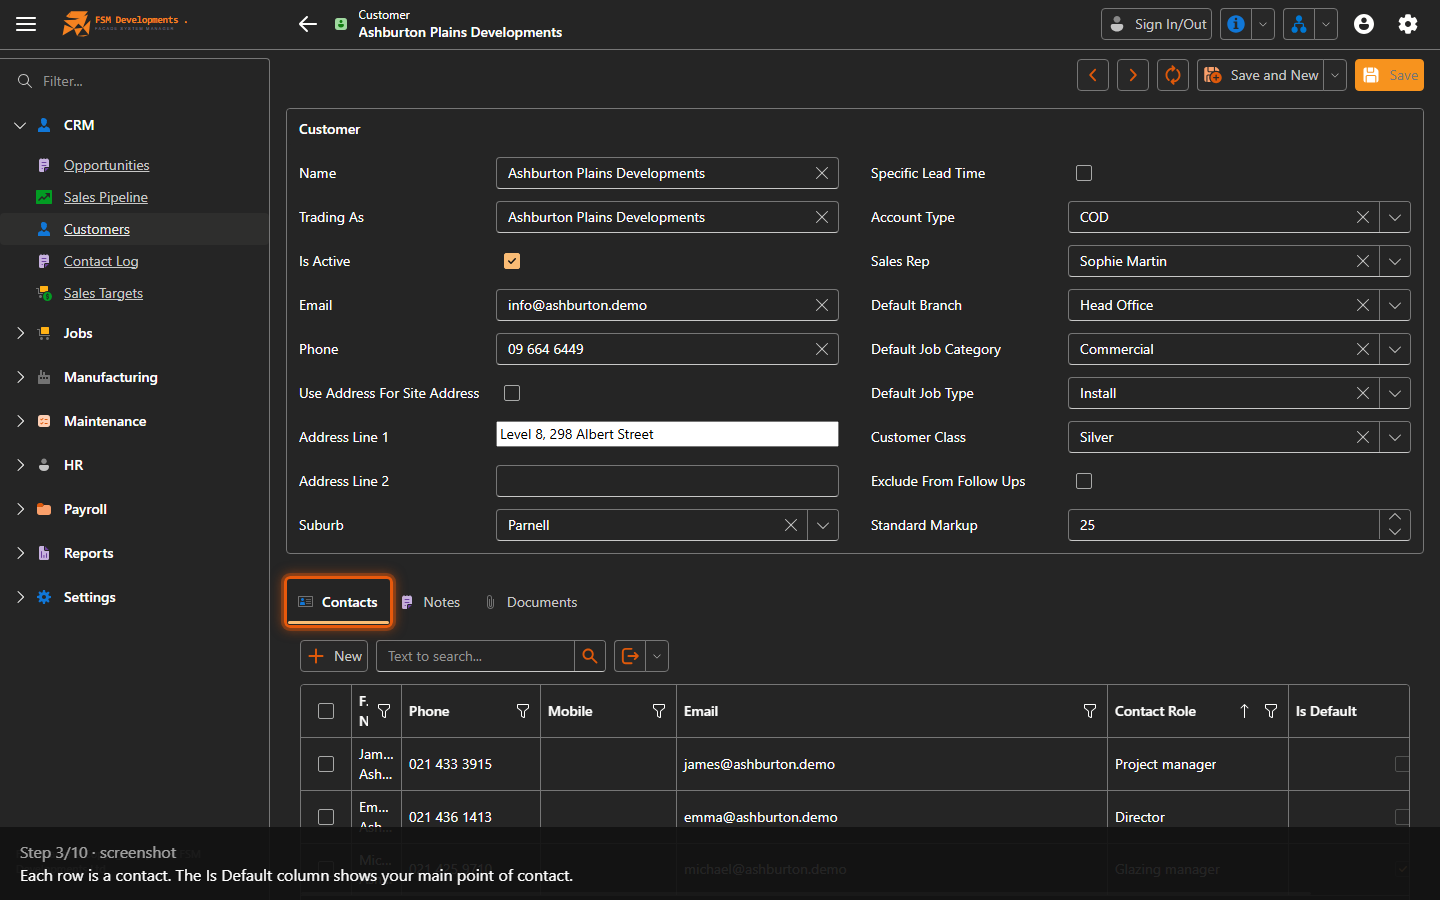
Contacts grid (Full Name, Phone, Mobile, Email, Contact Role, Is Default)
3. Each row is a contact. The Is Default column shows your main point of contact.
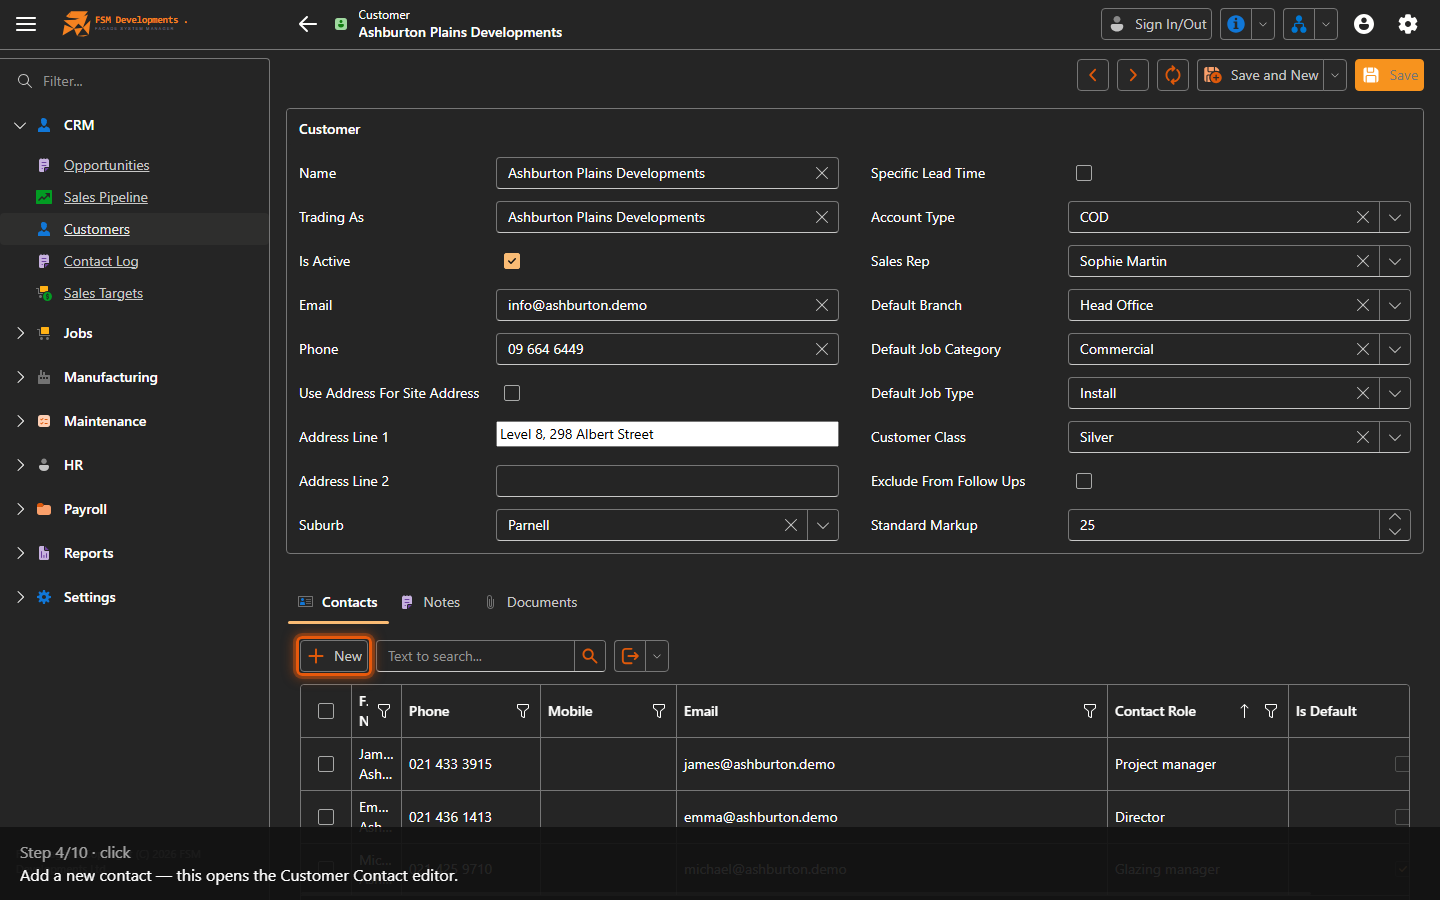
New (Contacts grid toolbar button)
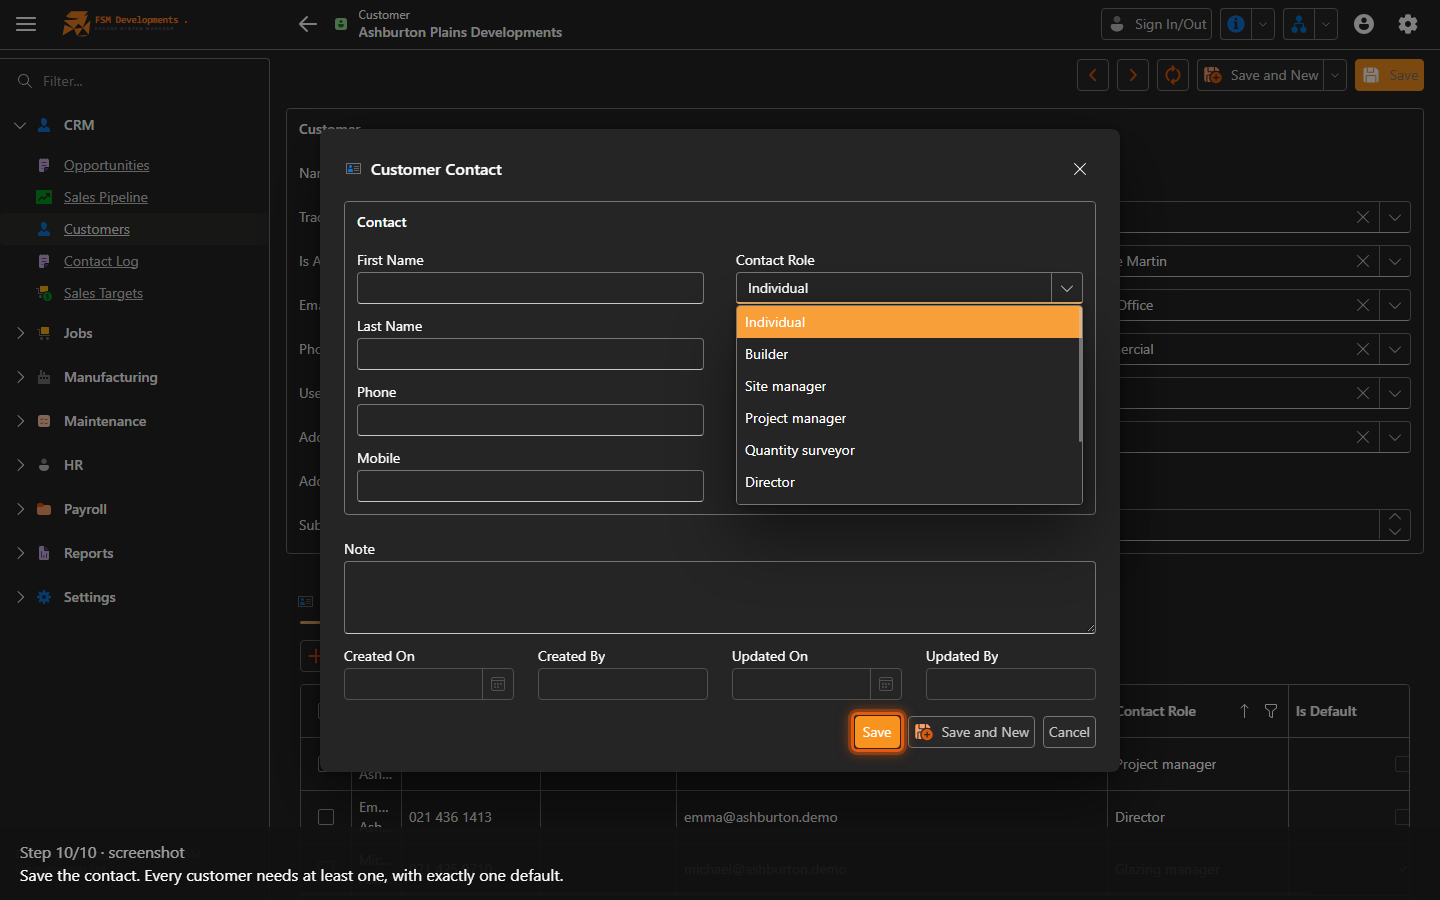
4. Add a new contact — this opens the Customer Contact editor.
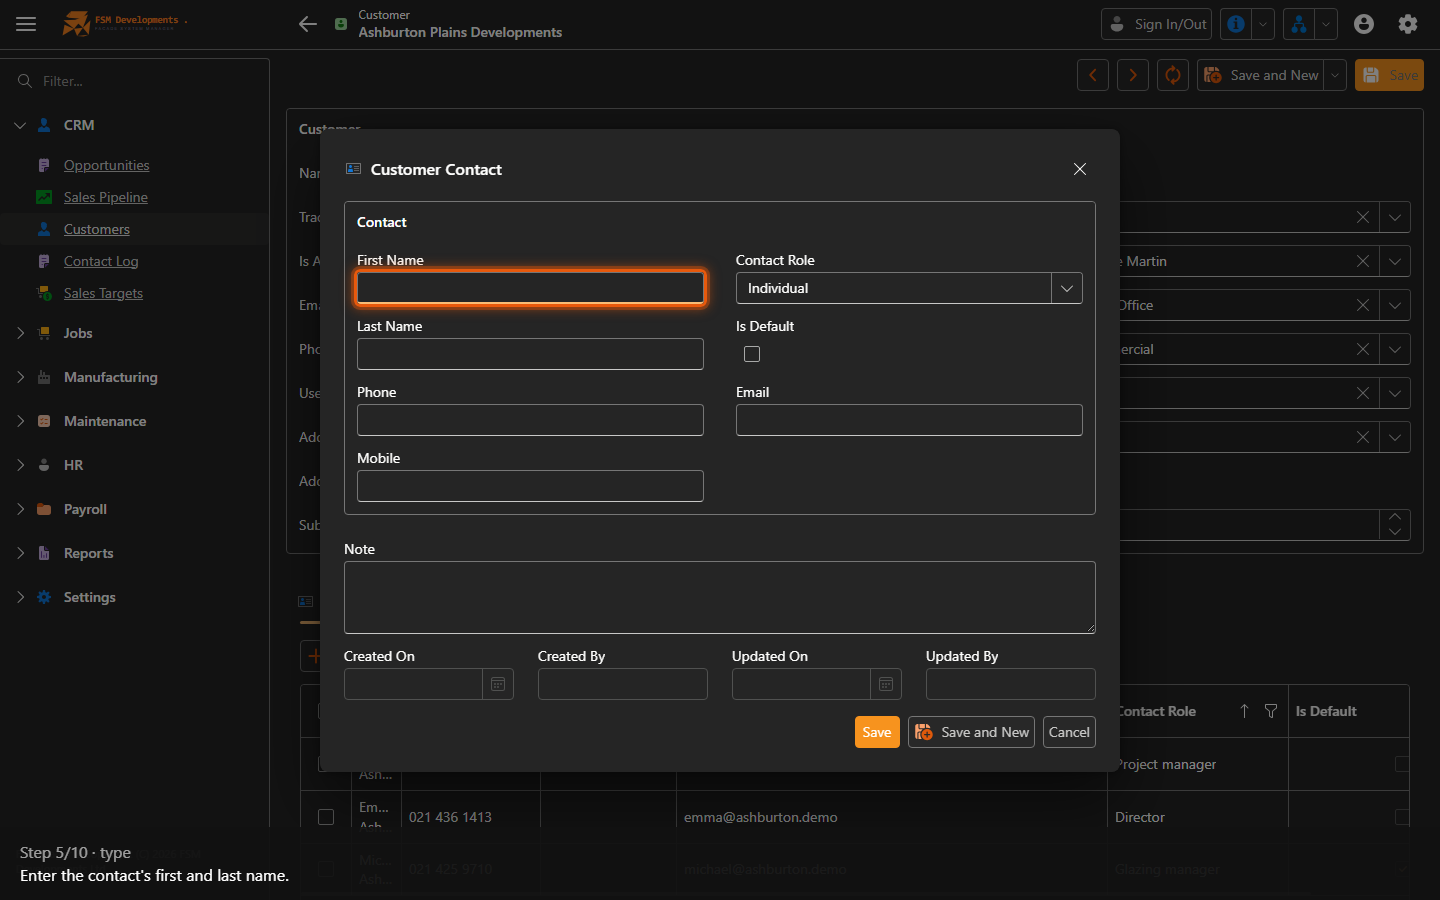
First Name (textbox, Customer Contact dialog)
5. Enter the contact's first and last name.
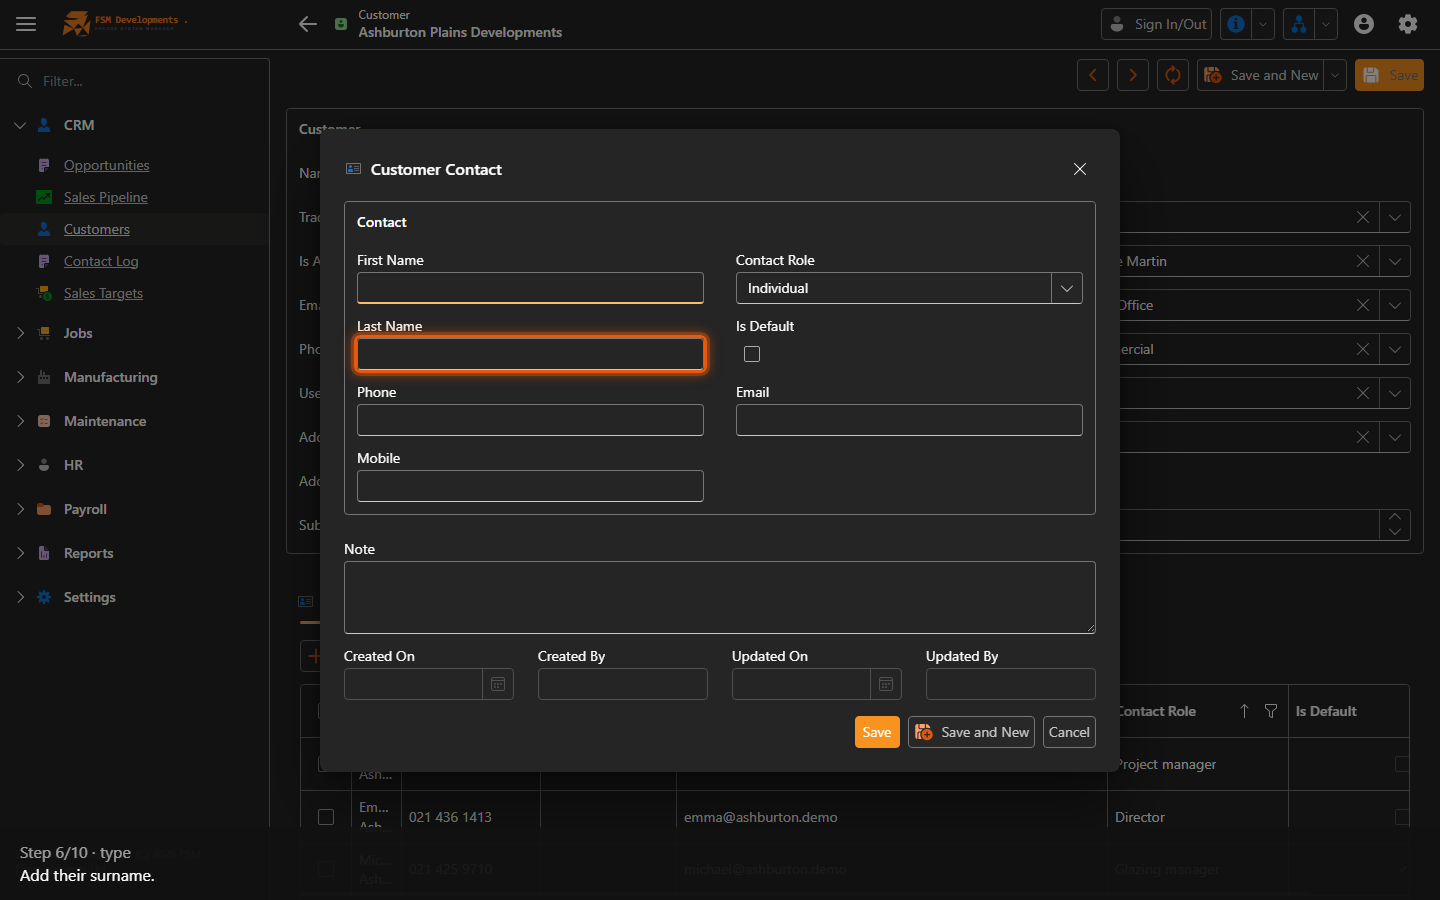
Last Name (textbox, Customer Contact dialog)
6. Add their surname.
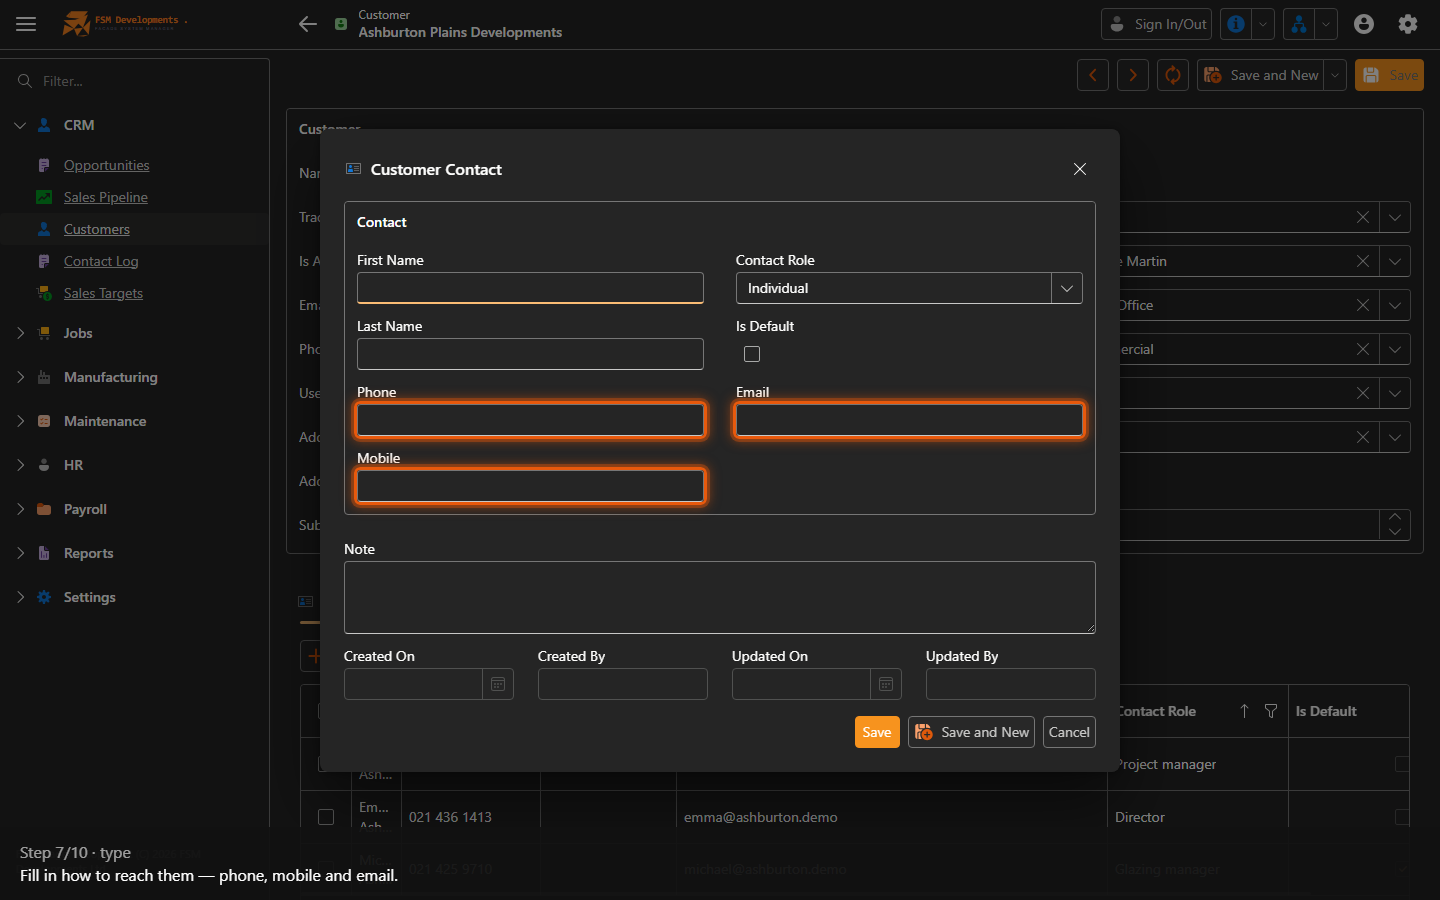
Phone / Mobile / Email (textboxes, Customer Contact dialog)
7. Fill in how to reach them — phone, mobile and email.
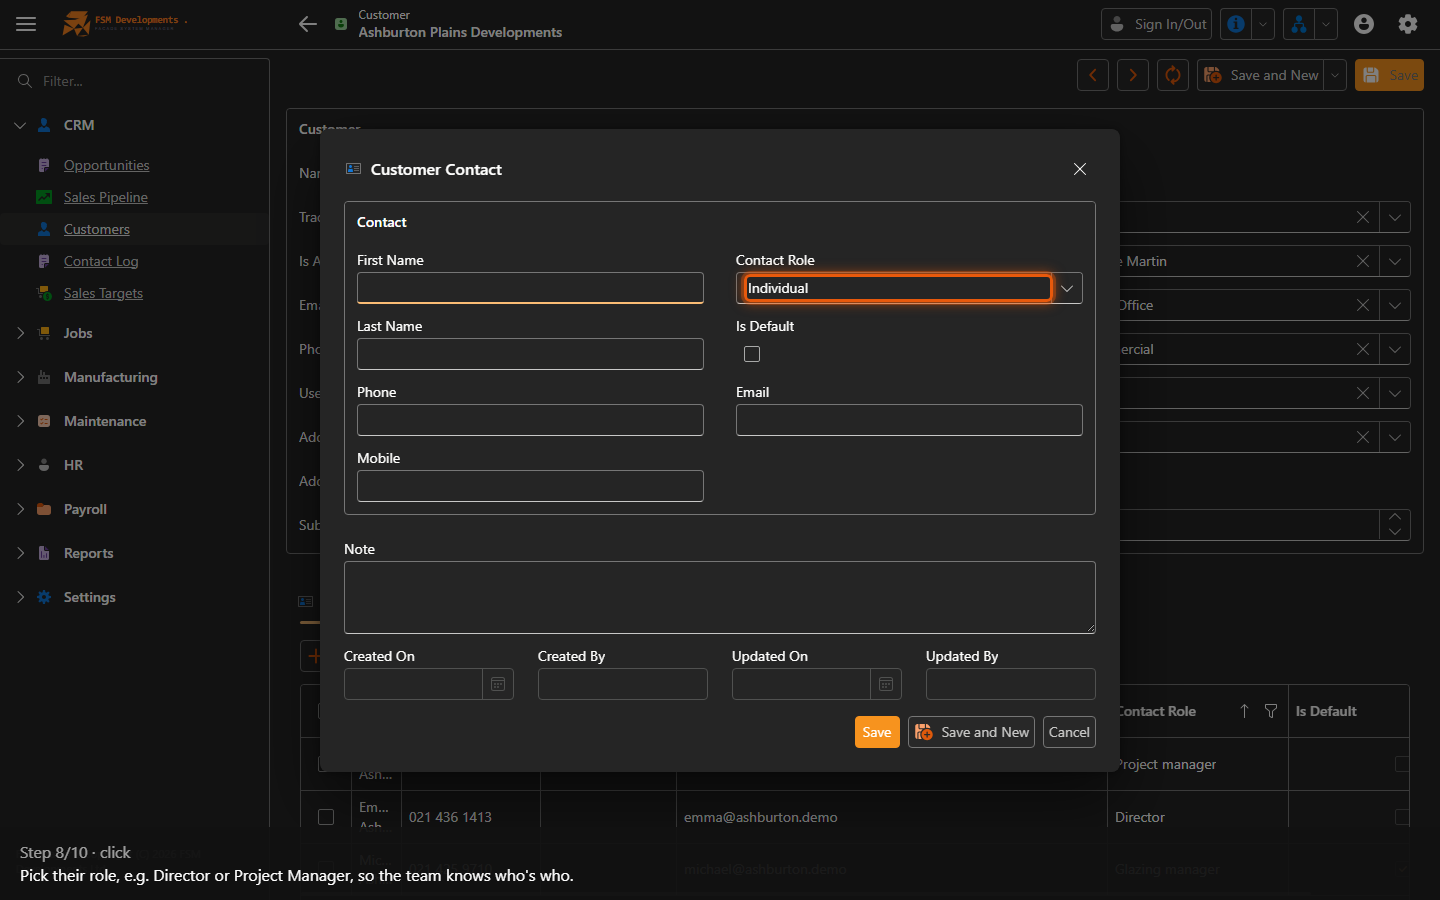
Contact Role (combobox, Customer Contact dialog)
8. Pick their role, e.g. Director or Project Manager, so the team knows who's who.
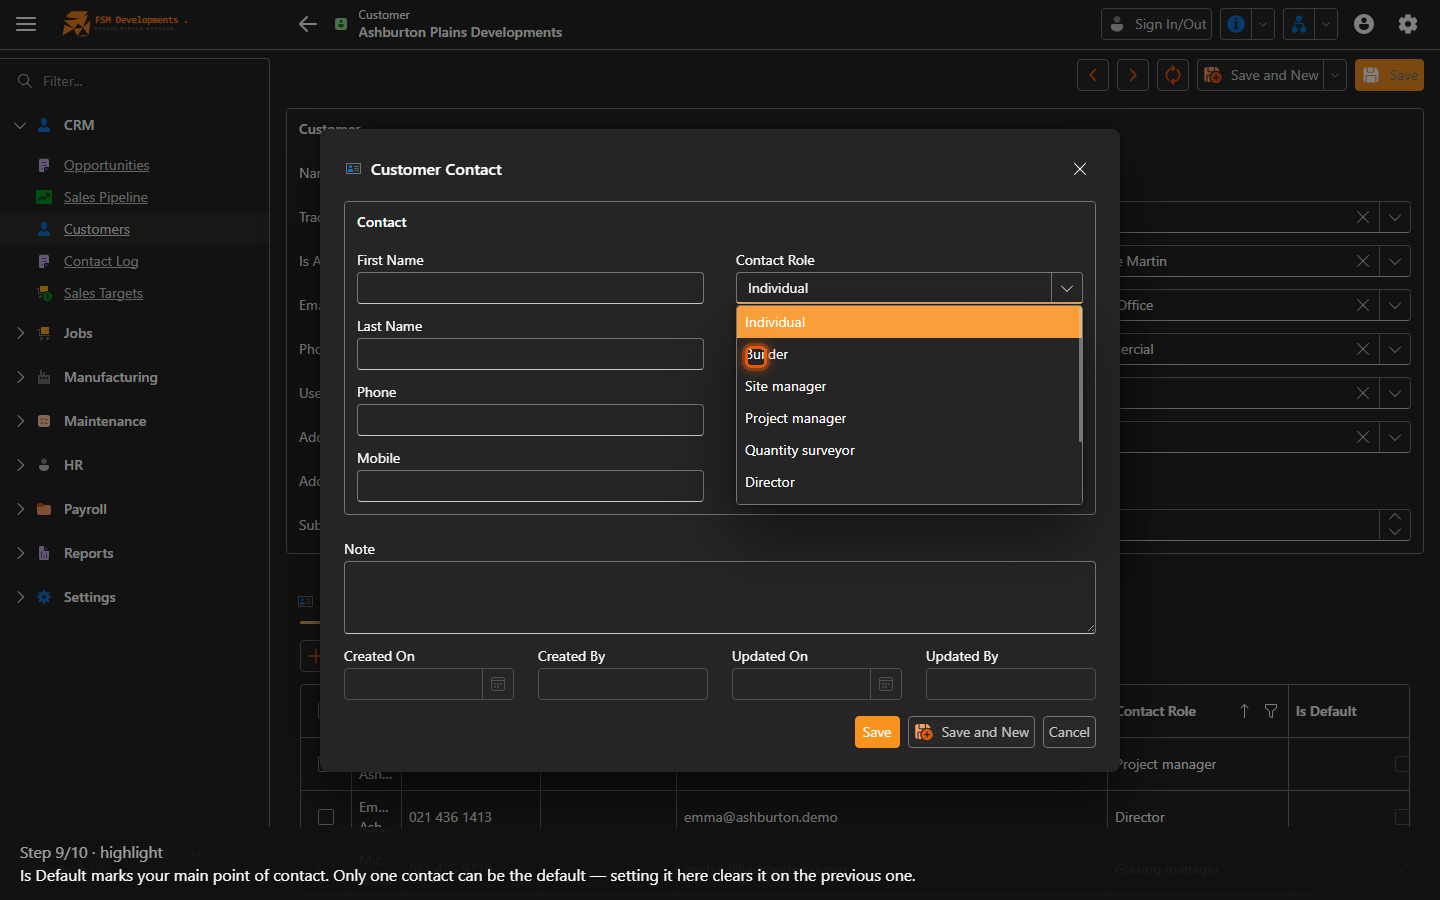
Is Default (checkbox, Customer Contact dialog)
9. Is Default marks your main point of contact. Only one contact can be the default — setting it here clears it on the previous one.
Save (Customer Contact dialog button)
10. Save the contact. Every customer needs at least one, with exactly one default.
Last updated on