Manufacturing
Lite+Track shop-floor progress as items move through the manufacturing stages of a job.
When to use
Use Manufacturing to mark factory work complete — task by task, item by item — as joinery moves through your shop. The data feeds the Job Manager dashboard, drives the Manufactured Date timestamp, and rolls up into delivery and IFOTIS reporting.
At Lite, Manufacturing is progress tracking — what’s been made, what’s left, how long it took versus what we estimated. Scheduling (slotting jobs into a manufacturing calendar with crew allocation) is a higher-tier capability.
Overview
Manufacturing piggybacks on the task framework already established in Job Management:
- A Job Stage can be flagged as a Manufacturing Stage (e.g. Manufacture, Powder Coat, Glaze).
- Tasks assigned to those stages drive completion.
- When all tasks across all manufacturing-flagged stages are Complete, the JobPart’s
Manufactured Dateis stamped (UTC).
That’s it. Everything else is housekeeping around that core flow.
Key features
Manufacturing-flagged stages
Each Job Stage you configure under Administration has an Is Manufacturing Stage flag. Stages flagged true contribute to the Manufactured Date calculation; stages not flagged are downstream of manufacturing (e.g. Delivery, Install).
Typical setup:
| Stage | Is Manufacturing Stage? |
|---|---|
| Site Measure | No |
| Manufacture | Yes |
| Powder Coat | Yes |
| Glaze | Yes |
| Delivery | No |
| Install | No |
Task scope: part-level vs item-level
A task definition (Job Task Definition) has a Scope:
- Part Level — one record per JobPart. Mark the task complete once and the whole part is done. Use for tasks where individual item completion doesn’t matter (e.g. Powder Coat Receive).
- Item Level — one record per JobPartItem. Mark each window/door complete as it’s done. Use for tasks where you genuinely track per-unit progress (e.g. Manufacture of each window).
- Both — the system tracks per-item but rolls up to a part-level record for the dashboard.
When all items on an Item-Level task are Complete, the parent JobPartTask auto-aggregates to Complete.
Task progress on the factory floor
For each JobPartTask:
- Status — Not Started / In Progress / Complete.
- Planned Minutes — your estimate for the work (typically copied from the quote import or a task default).
- Actual Minutes — minutes claimed by Time Recording.
- First Claimed / Last Claimed — timestamps of the first and most recent claims against this task.
- Completed On / Completed By — when and who marked it Complete.
For Item-Level tasks, the same fields exist on each child JobPartItemTask.
Factory-only fields on the JobPart
Two fields visible to the factory but kept off customer paperwork:
- Factory Note — internal note for the shop floor (e.g. “colour swap: customer changed mind on revision 2 — confirm with foreman”).
- Factory Display Name — overrides how the job appears in factory views (e.g. “Smith — 3 Sliders” instead of the full customer name). Null means use the job name.
Manufactured Date
The Lite tier’s signal that “this job is built”. Stamped automatically by the stage engine when all manufacturing-stage tasks are Complete on a JobPart. Drives onward views (delivery readiness, IFOTIS calculations) and reports.
Manufactured Date is set once. Reverting a manufacturing task to incomplete does not clear it — the stamp represents the first time the part was considered built.
Display abbreviations and the dashboard
Each task definition has a Display Abbreviation (e.g. MFGD, PWDC, GLZE). Those abbreviations are the column headers on the Job Manager dashboard, so workers can see at a glance which tasks remain.
The dashboard reads from Task Progress JSON — a denormalized snapshot of every task’s status, item counts, and planned vs actual minutes — that the stage engine rebuilds every time a task moves.
Pre-production tasks (ordering and receiving)
Some tasks are flagged as Pre-Production with a category of Paperwork, Ordering, or Receiving. Ordering tasks track supplier, order date, lead-time days; receiving tasks track received date and receiver. These let you sequence “we ordered the powder coat on the 3rd, due back the 17th” inside the same task framework.
How to: mark a part-level task complete
- Open the JobPart.
- Go to the Tasks tab.
- Find the task you’ve finished and open it.
- Set Status to Complete.
- Enter Actual Minutes if Time Recording isn’t already feeding them in.
- Save.
Completed OnandCompleted Byare stamped automatically.
If this task was the last one in its manufacturing stage, the part’s overall stage progresses to the next one.
How to: mark item-level tasks complete
For item-level work (e.g. each window manufactured separately):
- Open the task — its detail view shows the Item Progress group with one row per JobPartItem.
- As each item is finished, set its row to Complete.
- When the last item is done, the parent task auto-rolls to Complete.
If your shop has scanner stations, this can also be driven by scanning the item’s QR code rather than ticking each row manually (configurable per task).
How to: track time spent on a manufacturing task
Time tracking is handled by Time Recording:
- A worker clicks Start Task on the JobPartTask. The clock runs.
- They click Stop Task when done; the minutes attach to that task.
- Actual Minutes on the task increment with each claim.
If a worker forgets to stop, a supervisor can stop the claim and edit the minutes.
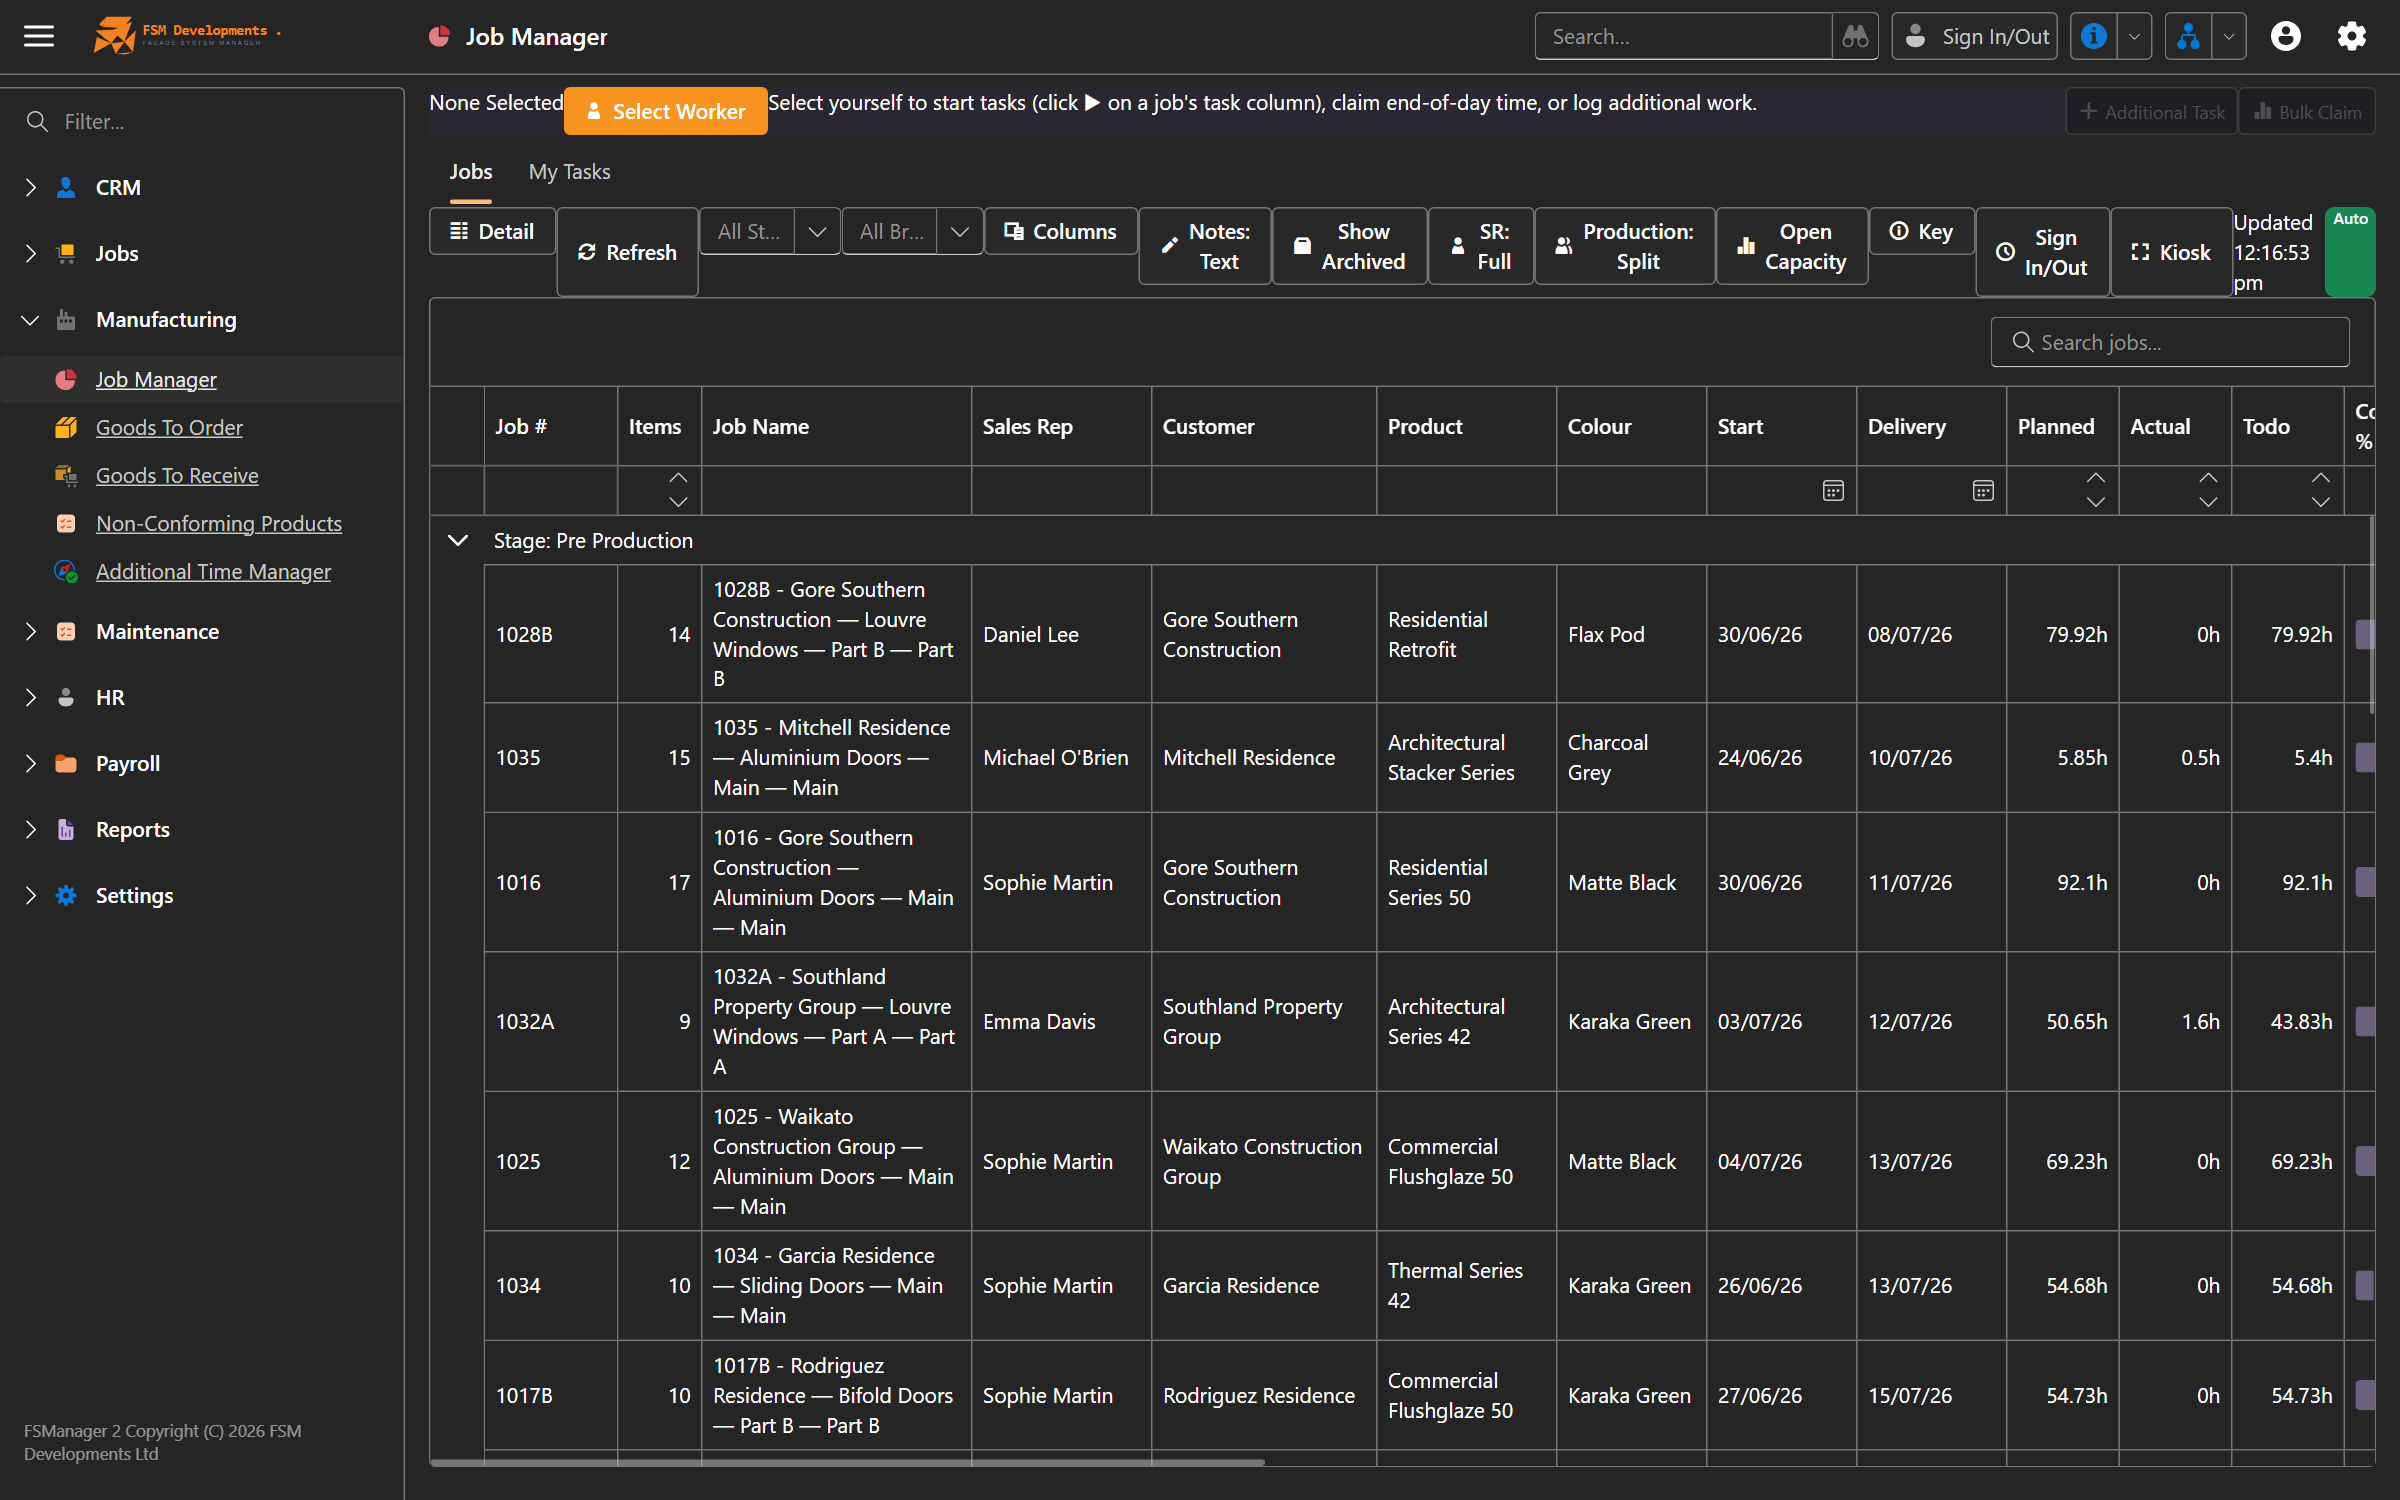
How to: see what’s in production
Open Job Manager under the Jobs menu. The dashboard shows every active job as a row, with columns for each task’s display abbreviation. Each cell shows the task’s completion percentage and a colour code.
Filter by stage, due date, or branch to focus on what your team is actually working on.
Tips & gotchas
- Don’t manually edit
Stageon the JobPart — it’s computed from task completion. To move a part forward, complete its tasks; to push it backward, uncomplete them. - Factory Note ≠ Note.
Noteshows on customer documents.FactoryNotedoes not. Choose deliberately. - Pre-production order tasks need received tasks. When you set up a Powder Coat Order task, pair it with a Powder Coat Receive task. The Receive task is what the system uses to know “we have it back, manufacturing can resume”.
- Set sensible Display Abbreviations. They have to be unique per tenant and they’re the dashboard column headers — keep them short (under 10 chars) and consistent (
MFGD,PWDC,GLZE, notManufactured,PowderCoat,Glazing). - Manufactured Date doesn’t un-stamp. If you find yourself wanting to clear it, that’s usually a sign the work was previously called done and you’re now redoing it — log a contact log or a non-conformance rather than rewriting history.
- Item-Level tasks scale with item count. A JobPart with 30 windows and 4 item-level tasks gives 120 task rows. That’s fine — the dashboard aggregates — but the JobPartTask detail view will be a long list.
Related
- Job Management — the parent context for every task
- Time Recording — how actual minutes get attributed to tasks
- Reporting & Analytics — Job Manager dashboard, planned vs actual minutes
- Administration → Settings — Job Stages, Job Task Definitions, manufacturing flag setup